I don’t often get all glammed up anymore after becoming a Mom. You can find me sans makeup with my hair up most days while I tackle mountains of cleaning and chase a busy toddler.. but when I DO get to do makeup for myself, I have a LOT of fun. I used to get all dolled up often and always found playing with my makeup to be soothing and an act of self care. I look at makeup as art and an outlet to be creative so I had SO much fun busting out all of my favourite palettes and shades to put together this look for the Holidays. To top it off, I received 4 gorgeous sets of vegan & cruelty free magnetic false lashes to put the cherry on top of this look. I had never tried magnetic lashes before and have always been intrigued by them.. the idea of not using glue near my eyes was a plus. I put together this post outlining the look I created with all the products used as well as a review of TOK Beauty’s magnetic falsies and a few tips and tricks on how to wear magnetic lashes.
* This post includes some affiliate links. This means that any product purchased from my links will generate a small commission (At no extra cost to you). As always, I will only recommend brands that have passed my seal of approval and that I truly love.. these commissions help to cover Bloom + Clementine’s fees so that this website can stay alive and I can continue sharing my green beauty passion with you all. Thank you for supporting my little green space on the internet. *
I’ll start off by going over the holiday glam look I put together. I was really inspired by the lashes to go a bit bolder with my shadows than I normally do and even add liner on my top lids to make the eyes pop. I stuck with neutral shadows, added a little extra contouring and highlighting and topped it off with a glossy lip serum. Generally when I think about holidays, I tend to go for bold reds, but I really wanted my eyes to be the focus on this one because the lashes are so gorgeous themselves. I opted for a berry nude shade by Fitglow instead which I will list below in my instructions.

The Look
* For more details on each product listed or to shop, click on the product name listed in pink If there is a discount code associated with the product or shop I have listed it beside the product *
Base/Prime:
I have skin that reddens very easily and I had just washed my face which usually gets the circulation going pretty heavily in my skin. When I want to conceal that redness, I grab my Green Rescue Cream by Fitglow which is tinted green to balance and correct red tones on the skin and also contains a formula that works to reduce redness beneath the skin at a cellular level. The green tint will calm the redness immediately as a colour corrector and the cream will continue to work underneath the skins surface to combat the source of the redness throughout the day.
- Hynt Beauty Sun Prep Primer SPF 25- Hynt Beauty (Called “Skin Prep” in Canada due to different SPF Guidelines)
Following my colour correcting, I always reach for my Hynt Beauty primer. Not only does it do a great job to fill in fine lines and crevices, but it creates a great surface and “grip” for your foundation to hold onto throughout the day. I do find a difference in using this primer, which I cant say for all primers. I was not always a primer advocate but a select few primers have changed my mind, this one being the top of the list for me. It also contains Titanium Dioxide which provides an SPF level of 25. Regulations for stating SPF levels on products differ from US to Canada and Hynt has not yet gone through the phases of having this product listed as an SPF in Canada which is why it has a different name when sold in Canadian retailers like the Detox Market. Regardless, I am content knowing that my skin is receiving extra protection under my makeup. You think about those things a little harder as soon as you hit your thirties lol. Not to mention, this primer smells like fruit punch.. its delicious!
Concealing/Foundation:
This has become my number one choice for green beauty foundations.. no, foundations in general (it tops all my old conventional ones by far). The formula is a liquid foundation that is full coverage and sits so beautifully on the skin. It offers a perfect balance between matte and dewy so your skin looks natural yet all the imperfections are hidden. I have had someone tell me that it rivals her old favourite by Giorgio Armani which is a high end foundation that costs a pretty penny. I would have to agree, there is no other foundation that touches the finish of this one for me. I will forever be a “Salty girl foundation wearer”. I applied the foundation using my Teddy Brush by Fitglow Beauty. Alternatively, you could use a beauty blender. For reference, I use shade “Tiffany” in Salty Girl Foundation.
Fitglow has come out with this full coverage concealer as one of their new releases this year. I’d have to say its my favourite concealer! I used a shade lighter than my natural skin tone (C1) to lighten and brighten beneath my eyes and the bridge of my nose. This brightening helps add to any contouring you do with darker shades afterwards, it provides depth. I applied the concealer using the wand and then feathered it out with a soft brush to avoid any lines over my foundation. Some may find it odd that I apply concealer over foundation, but this is a common practice by many makeup artists. If I needed to conceal blemishes, I would use my regular shade (C2) and dab before applying foundation.
Contouring/Setting:
I used Well Peoples loose powder bronzer to create a contour and add some colour to my face. I used my brush to sweep across my cheek bones up to my ear line. A good trick to find your cheekbones is to suck in your face “like a fish” and apply. W3ll People’s bronzer has a very slight sheen to it, but not too much which I tend to find overpowering. Since this look was a bit more glam I decided to go with this one rather than my regular choice of matte bronzer. After sweeping up my cheekbones, I took a soft brush a swept a small amount of the bronzer along my hair line over my forehead, and blended it into my jawline a bit to give a more defined jaw. Make sure you blend it well into your neck so you don’t mismatch your neck.
Another winning product for me from Hynt Beauty is their FINALE setting powder. Setting powders are another product that I didn’t always believe in (Hynt has literally changed my mind on two products, primer and setting powder). Many setting powders create the worst powdery white look on my skin and I end up looking like I’m wearing a ton of caked on makeup. Hynt’s setting powder is a translucent loose powder that creates a filtered veil over your makeup. It almost creates its own instagram filter look which I can appreciate on the days where my skin is not behaving or looking smooth. The setting powder will lock in your makeup so its stays put for the day and doesn’t start to slide off your face. This product ensures my redness doesn’t peek through mid day which I love!

Eyes:
I used all three eye shades from this palette. The palettes comes with three eye shades, a blush and a highlighter. The shades I used are:
“Boyfriend’s Band”(Pure white, pearlescent eye shadow): applied to the lids, inner corners of the eye as well as outer corners to create a bit more drama and contrast to the darker shades.
“Private Show” (Bronze, milk chocolate eye shadow with rosy undertone): Applied in the crease of my eye. Ensure you take a clean soft eye shadow brush and blend out the colour after applying to avoid hard edges.
“Unplugged” (Matte black eye shadow with flecks of superfine silver glitter): I used this shade as a liner. I dampened my liner brush and applied to the lash line up top. I lightly applied the same shade to my bottom lash line but stopped half way, running the line completely across the eye can create a smaller eye. I smudged out the bottom line a bit to create the slightest smokey effect.
Highlight:
This highlighter is one of my favourite options for when I am going out. It creates the most GORGEOUS lit from within glow and sits really well on the skin without looking too much. It is a finely milled loose powder and a little goes a long way. Using a soft bristle brush I apply to the tip of my nose, above my cheek bones and cupids bow.
Lips:
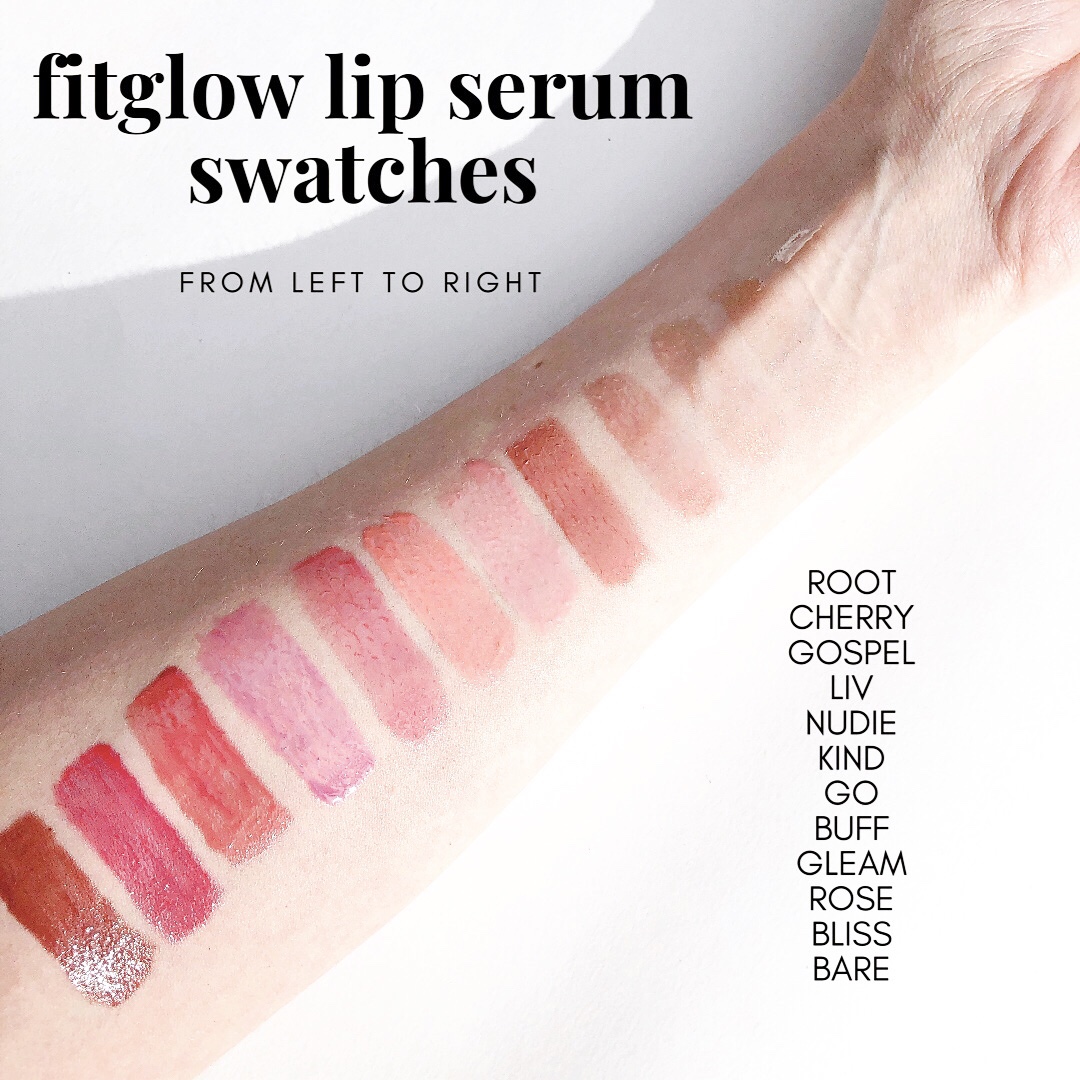
I wanted to stay away from a bold red despite the fact that its holiday season because I wanted the lashes to be the focus of this look. They are too pretty to overpower, though I’m not sure a red lip would have.. I played it on the safe side and went for a deeper berry nude shade and used a gloss rather than a lipstick or stain. I opted for Fitglow’s Lip Serum in Gospel which added the perfect amount of pop to the lips without making them the focal point. Love these serums!
Brows/Lashes:
This is my very favourite brow product because it fills in brows nicely and naturally but it ALSO works at promoting brow regrowth. This is something I have been trying to remedy since my overplucking days of the 90’s. It has helped my brows tremendously! The pomade comes with a double sided brush and spoolie to perfectly apply the pomade. Feather it lightly using upward stroke and I line the bottom finely to create a bolder brow. I use the shade “Ashy Daybreak”.
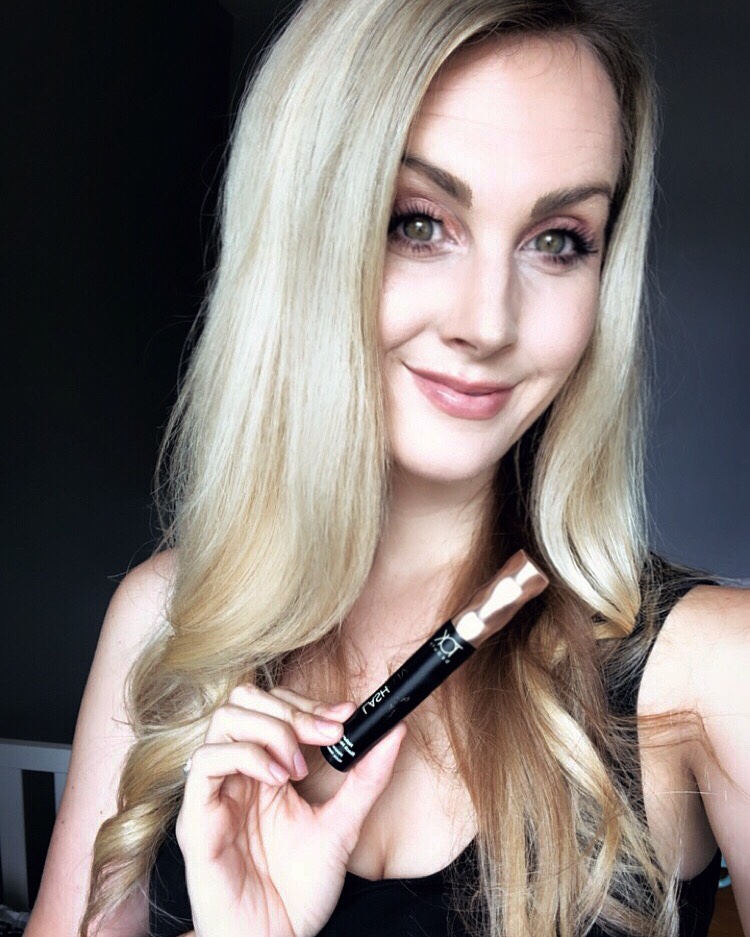
Then to top it all off I applied my brand spankin’ new false lashes. They apply best over mascara so after a swipe on each eye, I used the applicator to apply the Au Naturale Lash in Short length. I really love this option the best, It fans out nicely and isn’t too over the top for a holiday party. If I were going to a wedding I would likely opt for the Classic Lash, which is equally as gorgeous on and slightly more dramatic. Once applied, I used my mascara wand to blend my lashes on the inside corners of my eyes into the false ones without coating the magnetic lashes. They really made the entire look POP.
TOK Beauty Guide and Review
Magnetic False Lashes
As I had mentioned above, I had never tried magnetic lashes before this. I was always interested in them as I am not new to false lashes applied with glue and figured these might not peel up in the corners of your eyes the same way other false lashes do when applied with adhesive. Not that I don’t love a good pair of glued on lashes, but there are some definite benefits to the magnetic option. They stay put, they are surprisingly feather light, and they DON’T pull up at the corners of your eyes like glued on versions do. They DO require a bit of a learning curve on application, which I wasn’t expecting having been pretty good at applying lashes with adhesive but once I figured it out with a few tips from TOK Beauty’s founder, Tara, I was blown away at how much I really loved them! It didn’t take me very long to figure them out either and practice makes perfect. Not to mention, with good care the magnetic option will last MANY more applications than glued on lashes will. You can watch videos on how to apply these lashes made by Tara HERE, I’m also listing some of the tips she sent me which worked wonders and made application a breeze! These are straight from Tara and are a great list of tricks that made applying them so easy.
Application Tips & Tricks:
-
The smaller applicator is for our SHORT version, The medium applicator is for our MEDIUM and LONG versions.
-
Apply mascara and eyeliner: Mascara will provide your lashes with a base for the lashes to grip or hold onto to. Eyeliner will blend the band into your eye line – the lash has a black cotton band similar to other false lash brands.
- Grab the top lash first and bend the band. Don’t be afraid to really bend it! The more curved the band is to your eye line, the more natural it will look on your eye.
- Once you bend the top band, place it to the side outside of the box so that it doesn’t straighten out again.
- Grab the bottom lash and bend it upwards to go with the natural curve of your eye line.
- Now you have two options – use the lash applicator, OR use your hands.
- If you use the LASH APPLICATOR – make sure the magnets are facing each other and that the lashes are going in the same direction as your natural lashes. Then you just go in and clamp them on! Easy, peasy.
- If you use your hands – grab the top lash, place it on top of your natural lash. Try not to move too much or blink while grabbing the bottom lash. Open your eye up and snap the bottom lash as close as you can to your eye line! Don’t be scared (Disclaimer: I was a little scared.. but Tara was right.. nothing happened to my eye and I am much more confident after having applied them a number of times now!)
- Blend in with mascara and eyeliner to any natural lashes that may not have been covered with the magnetic lash.
As I said, these tips made it so much easier and I was able to apply them no problem after three attempts on one eye. Once I had them on I realized how light they were. At first I wondered if I had applied them correctly but I had. I am used to the weight of glue and the potential of sealing my eye shut if done improperly so the lack of weight on my lids was a very welcomed effect! I think not being able to feel the edges of the band poking into my lash line from being glued there was also something I wasn’t feeling and I am ALL FOR THAT!
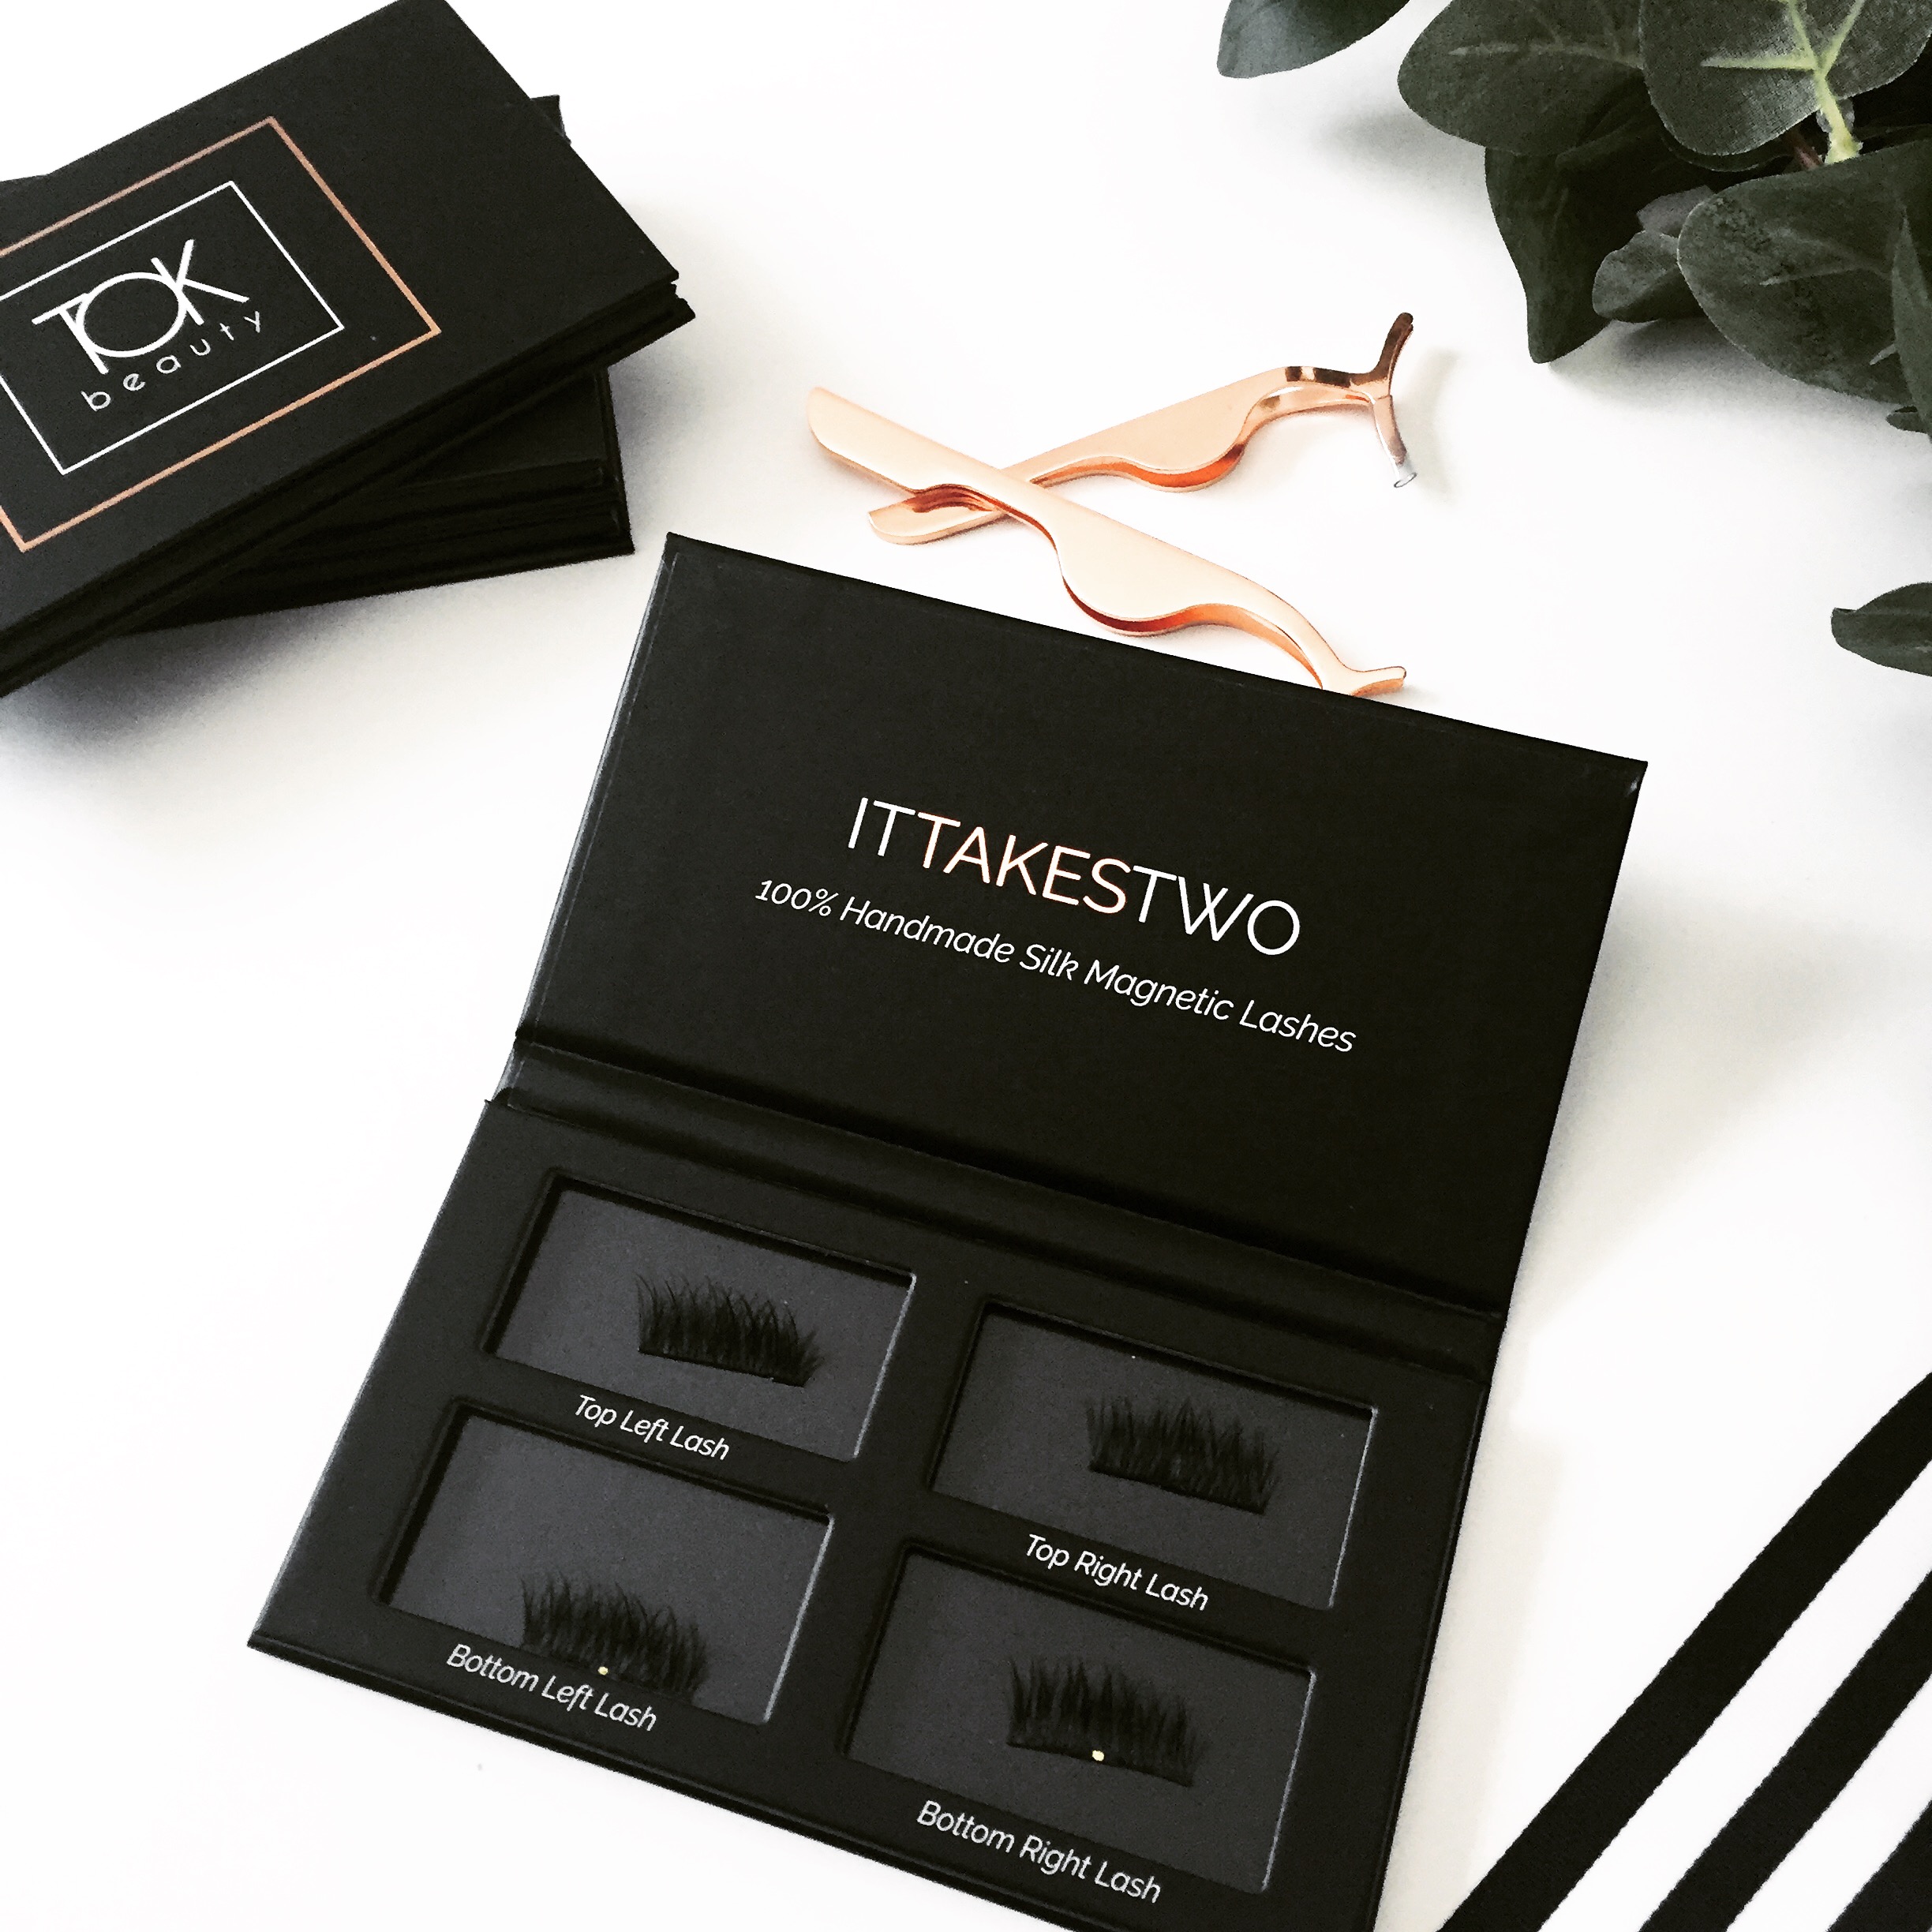
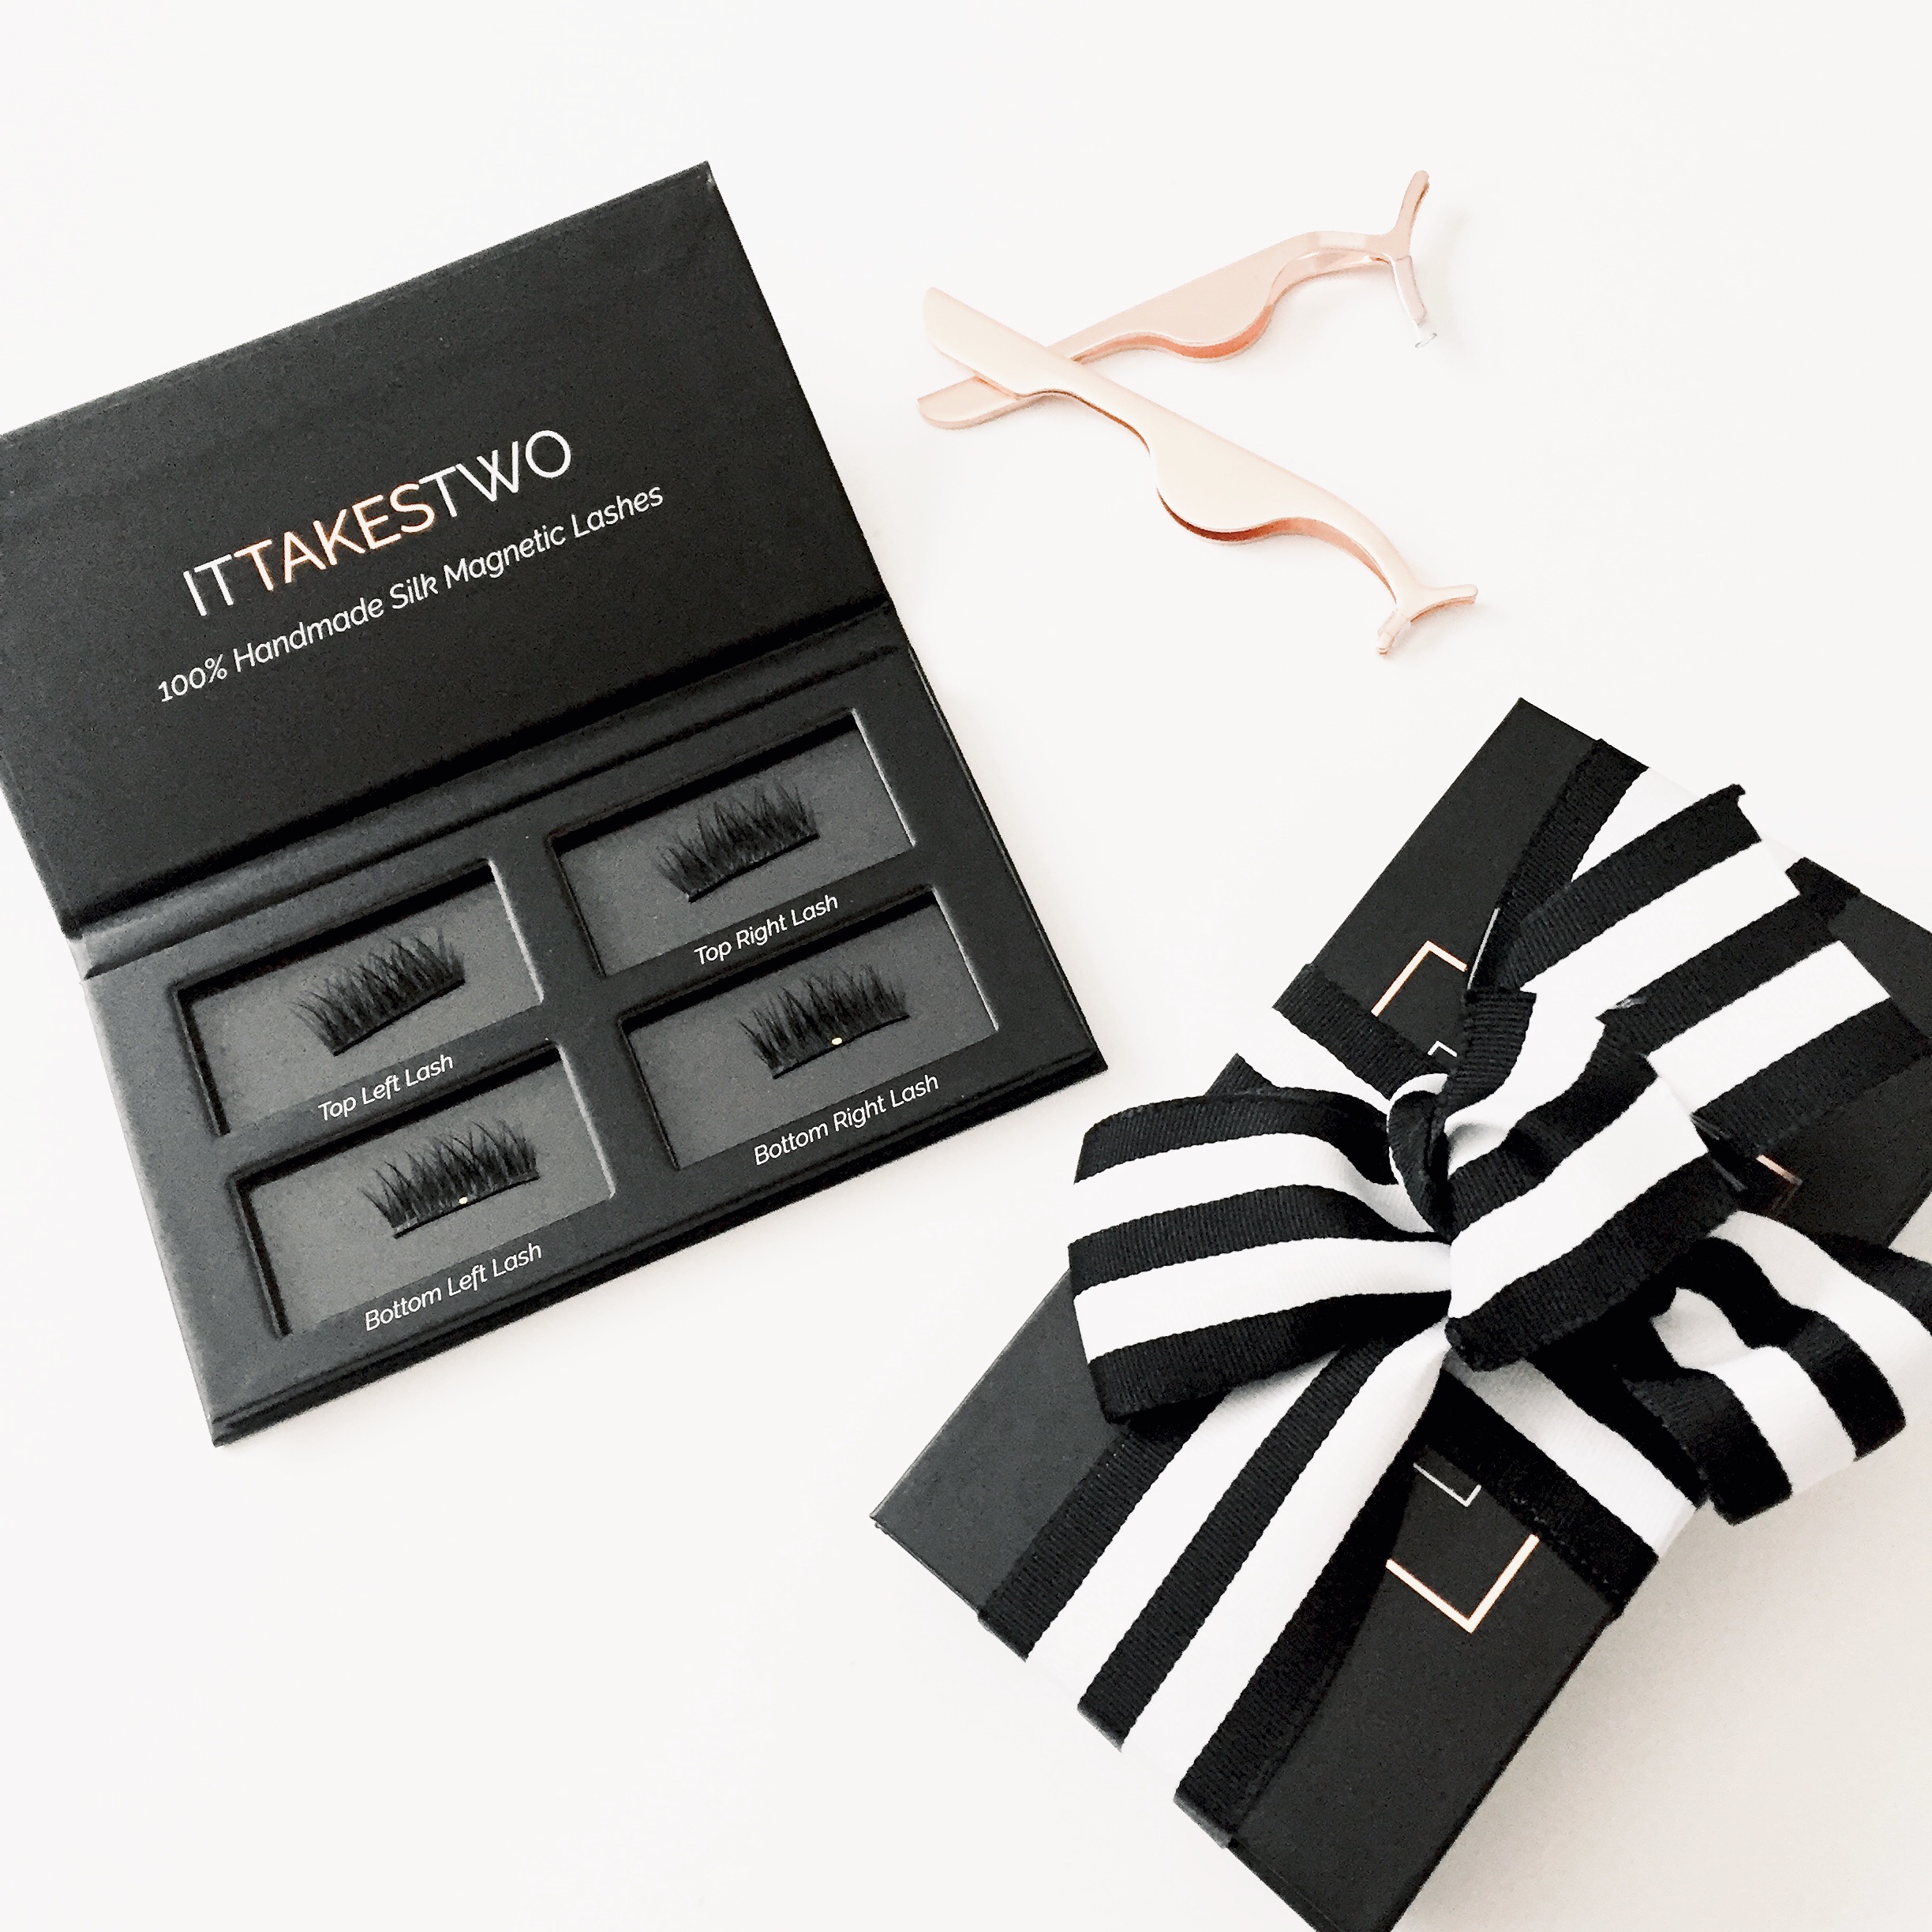
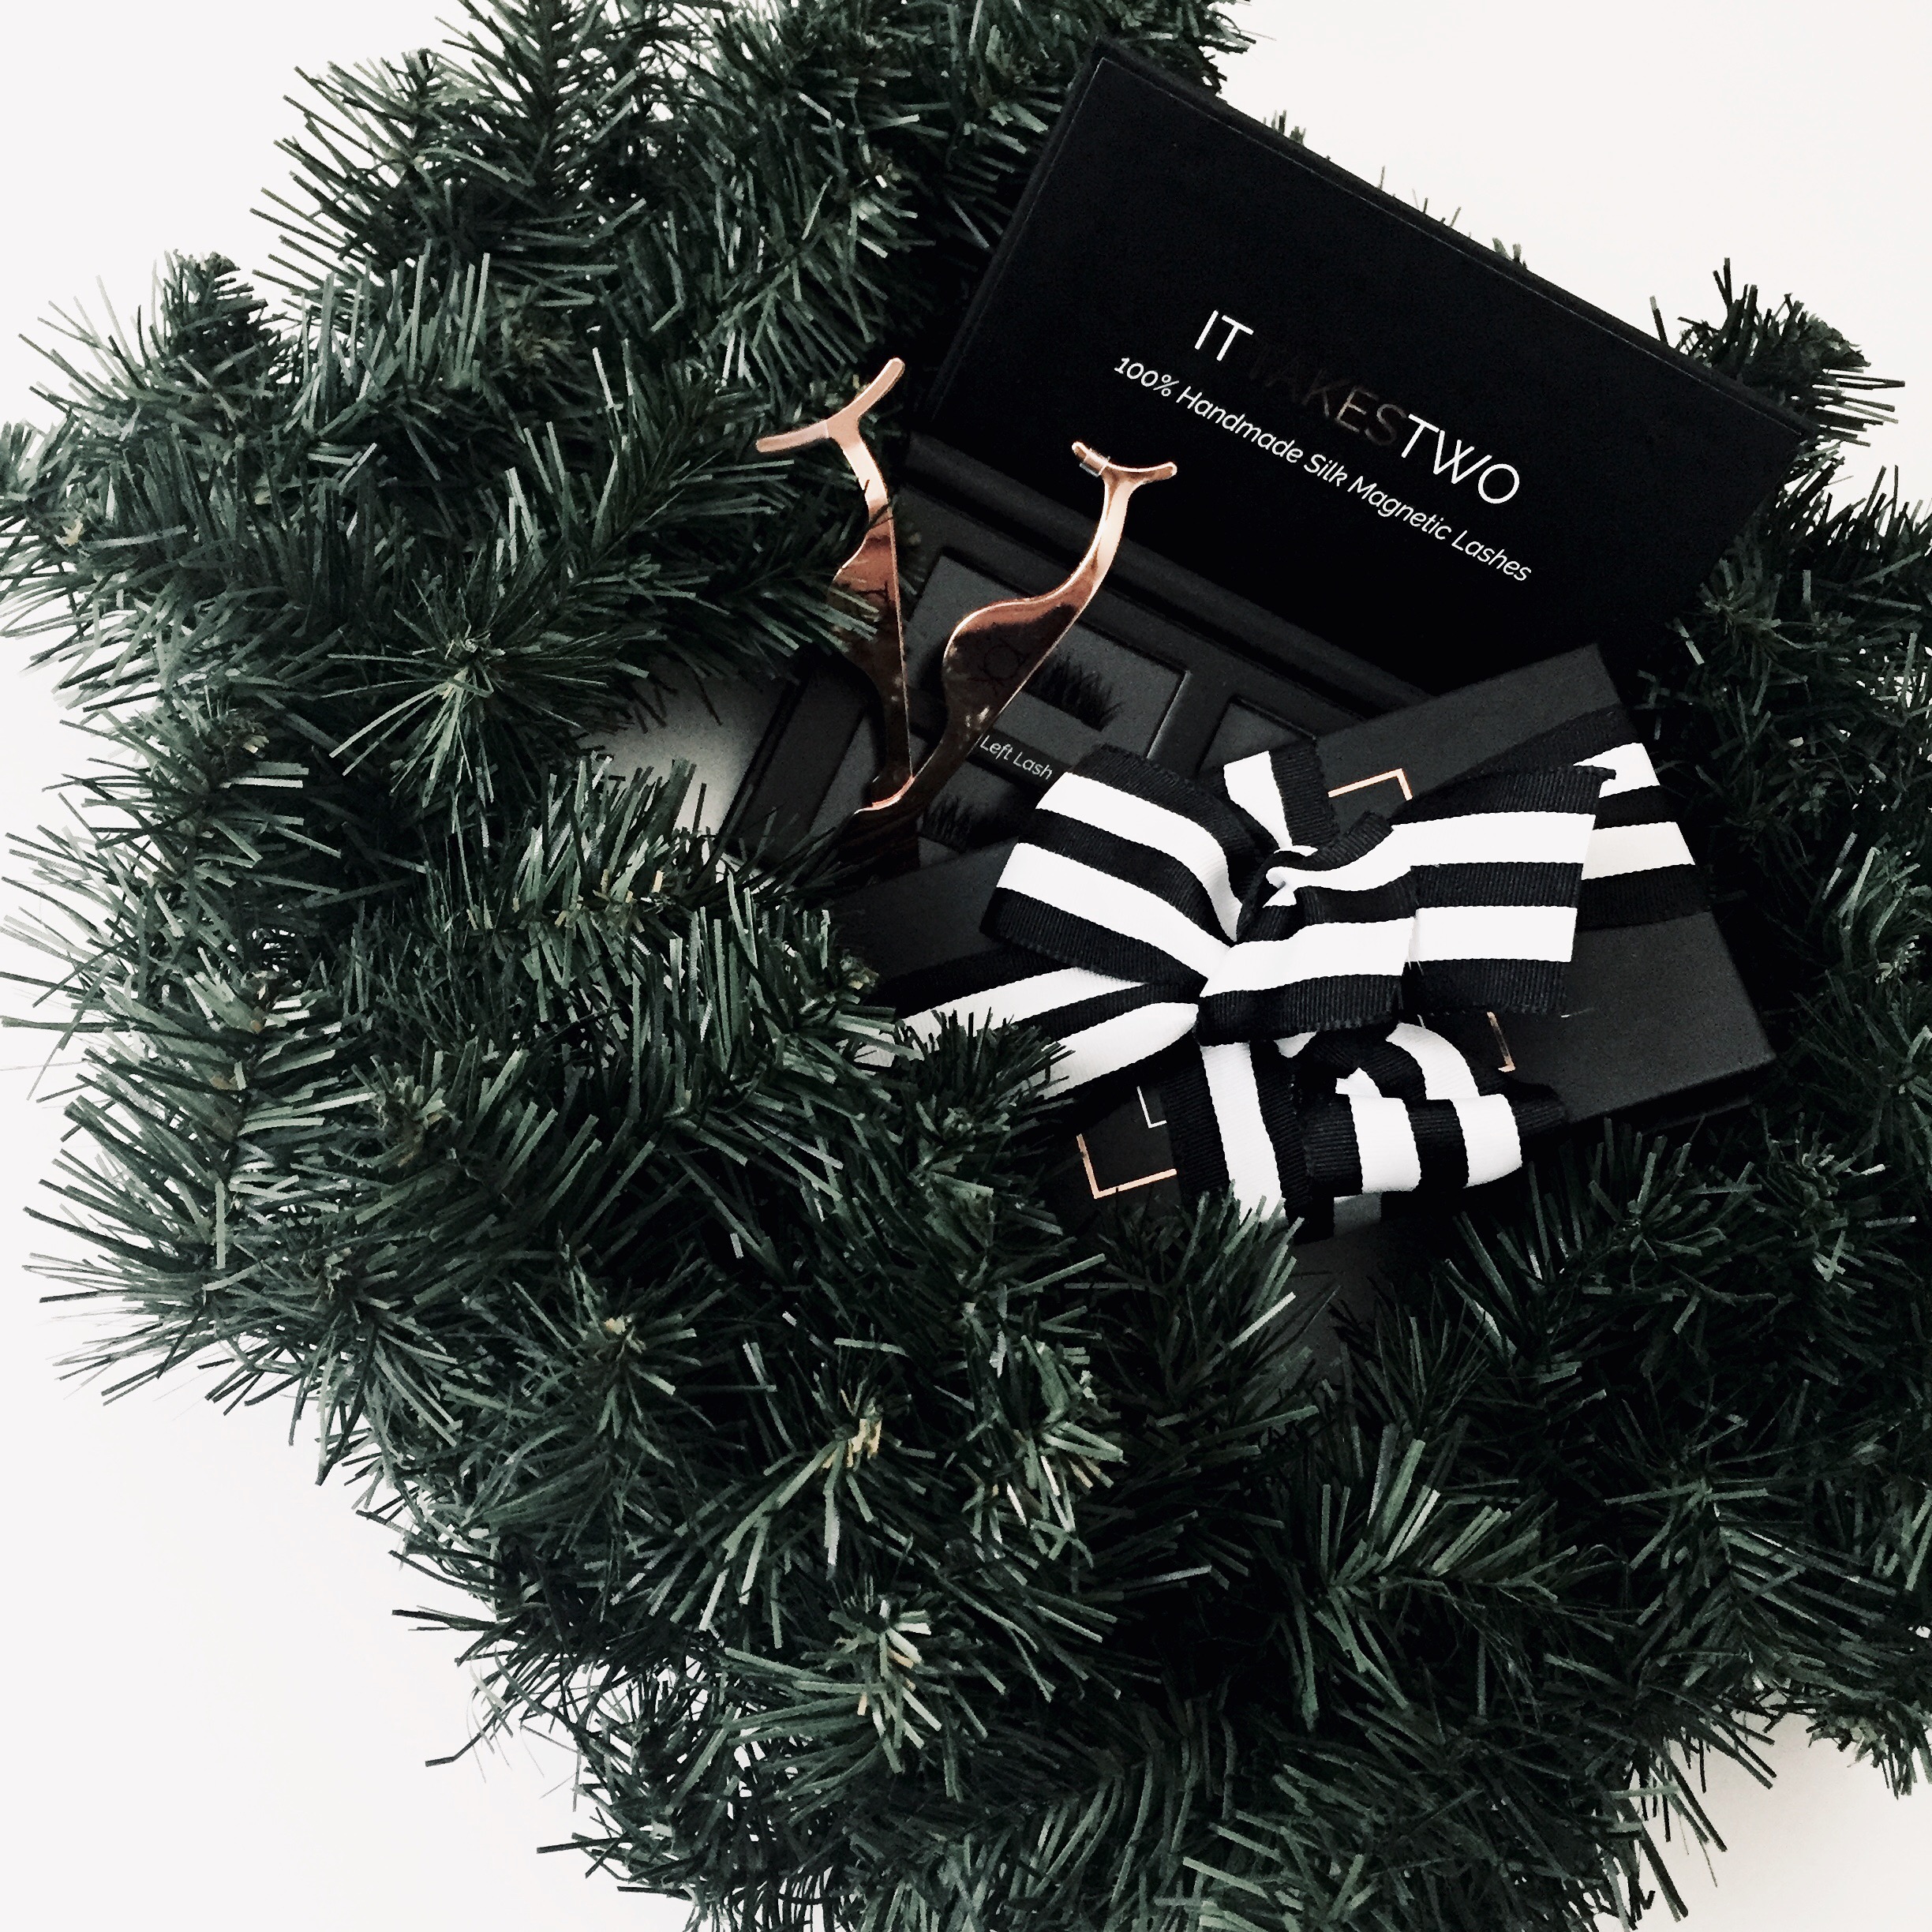
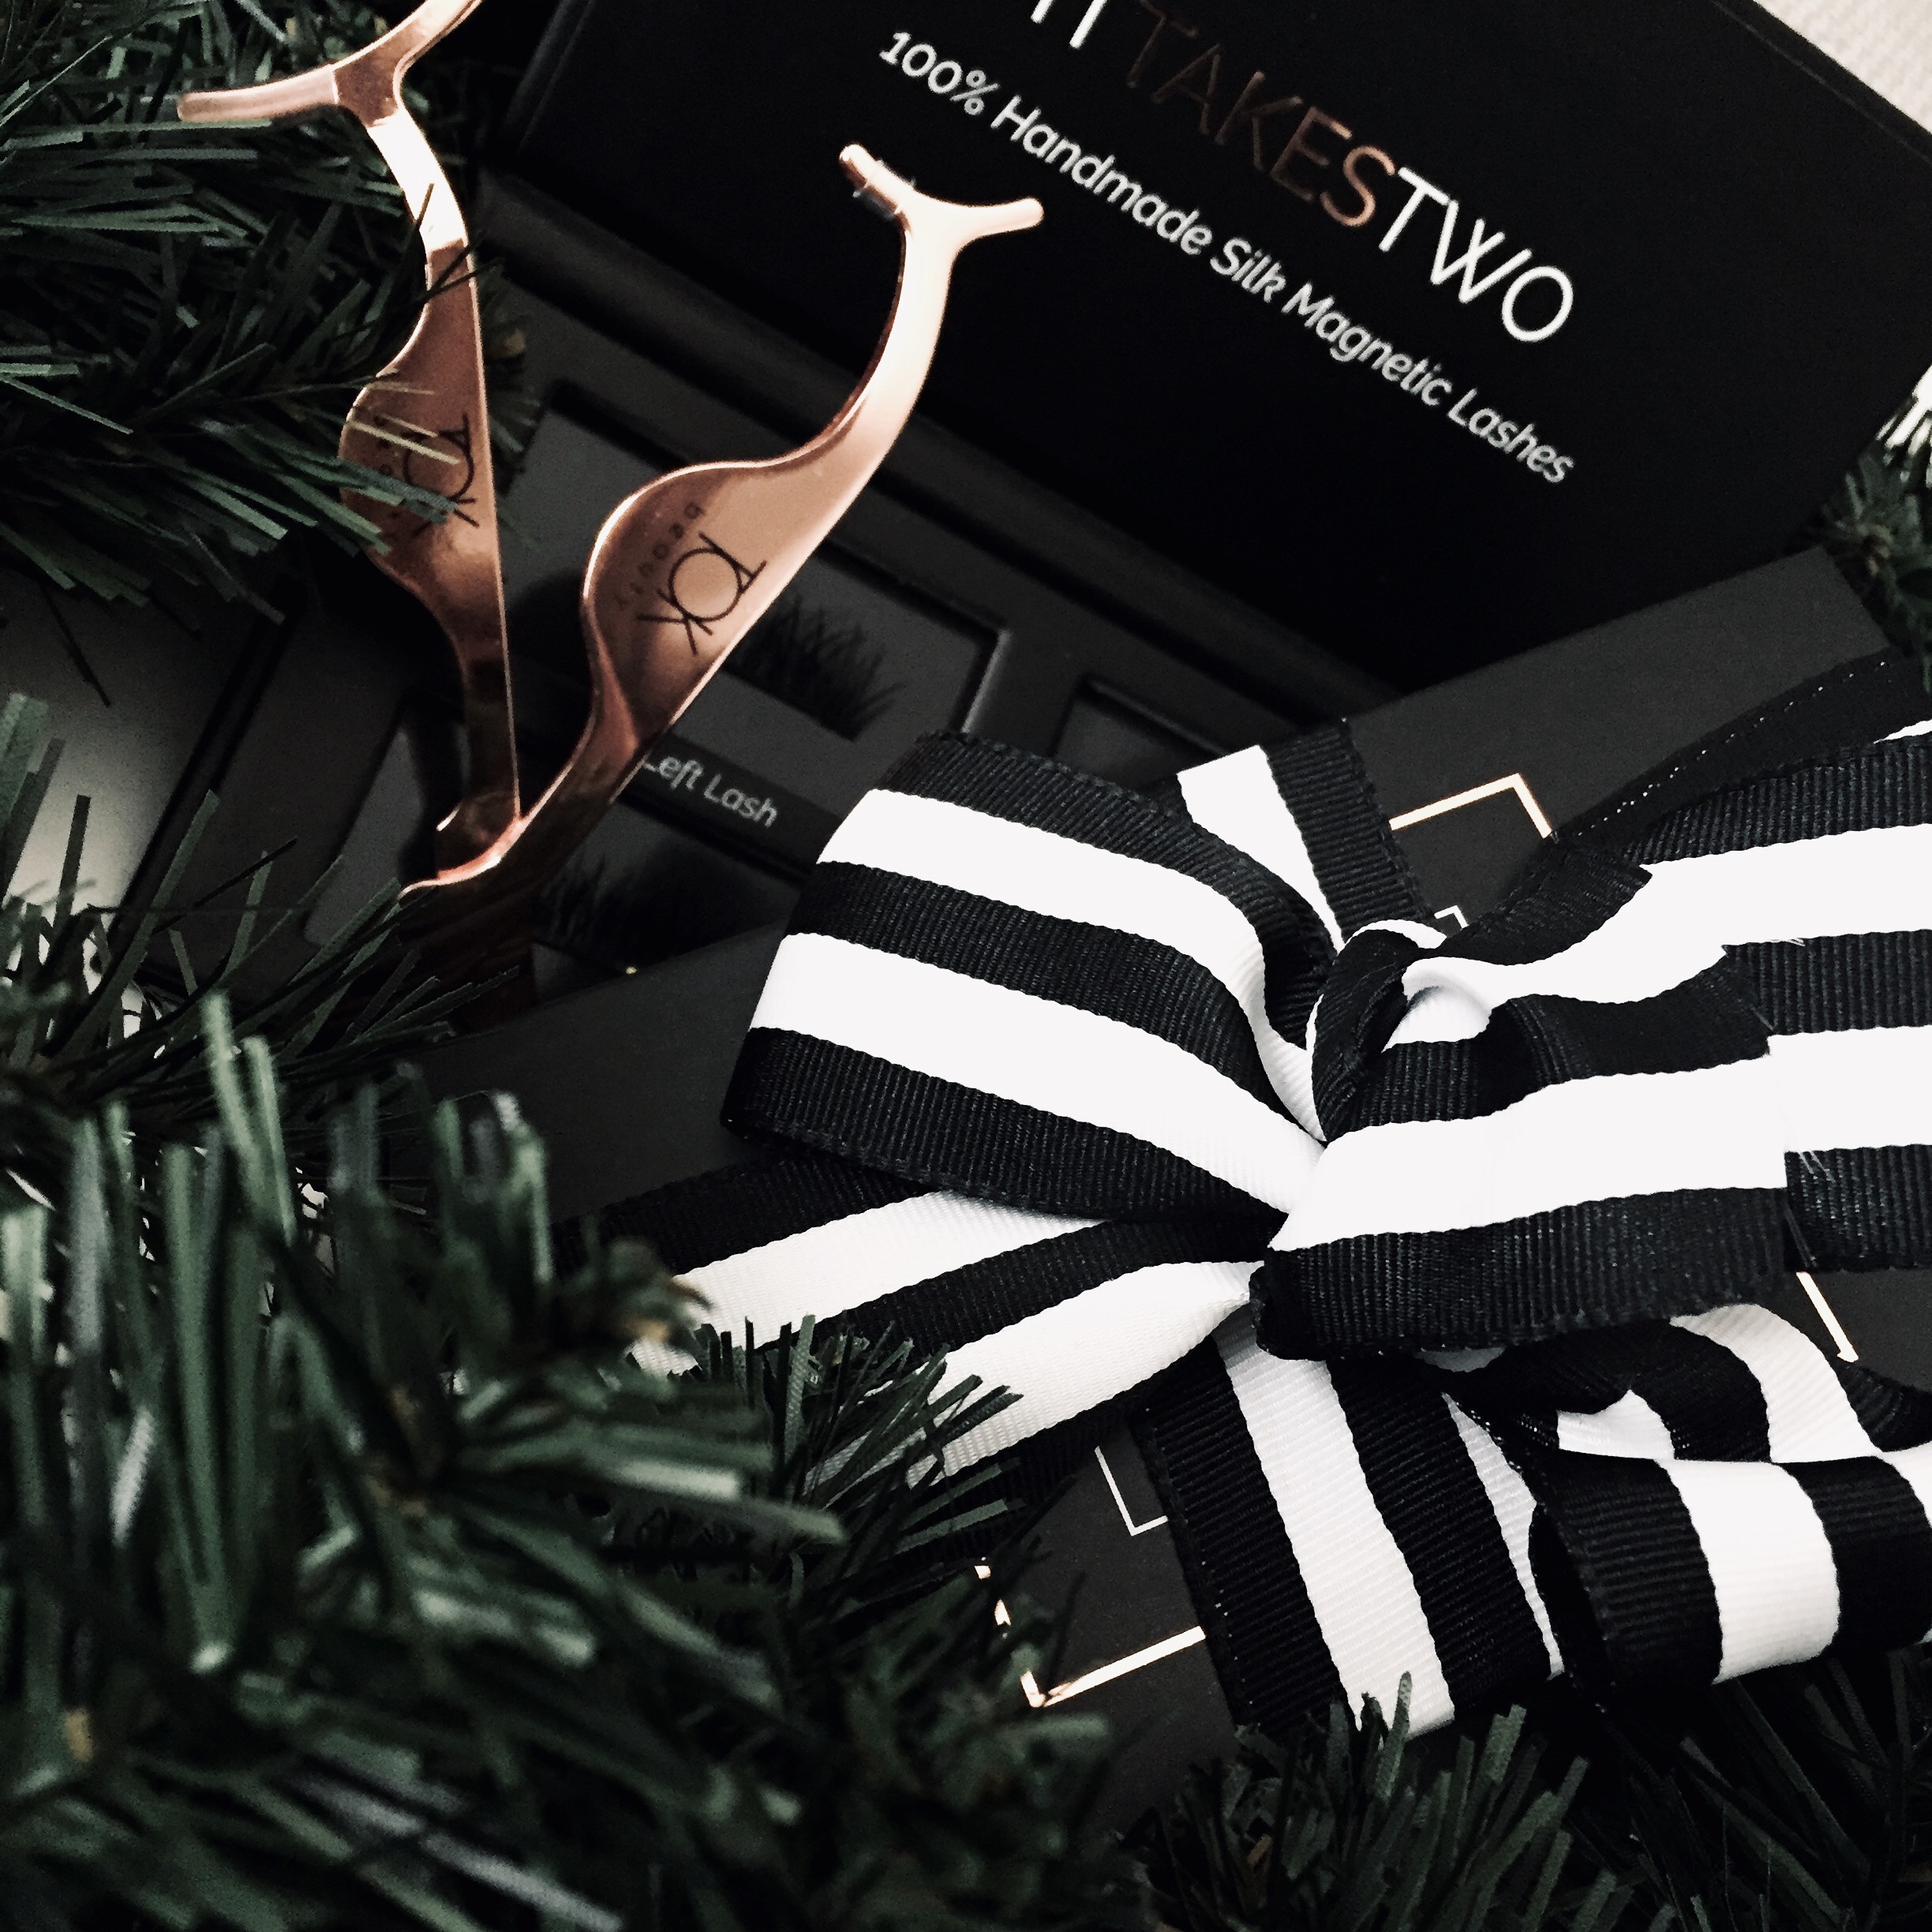
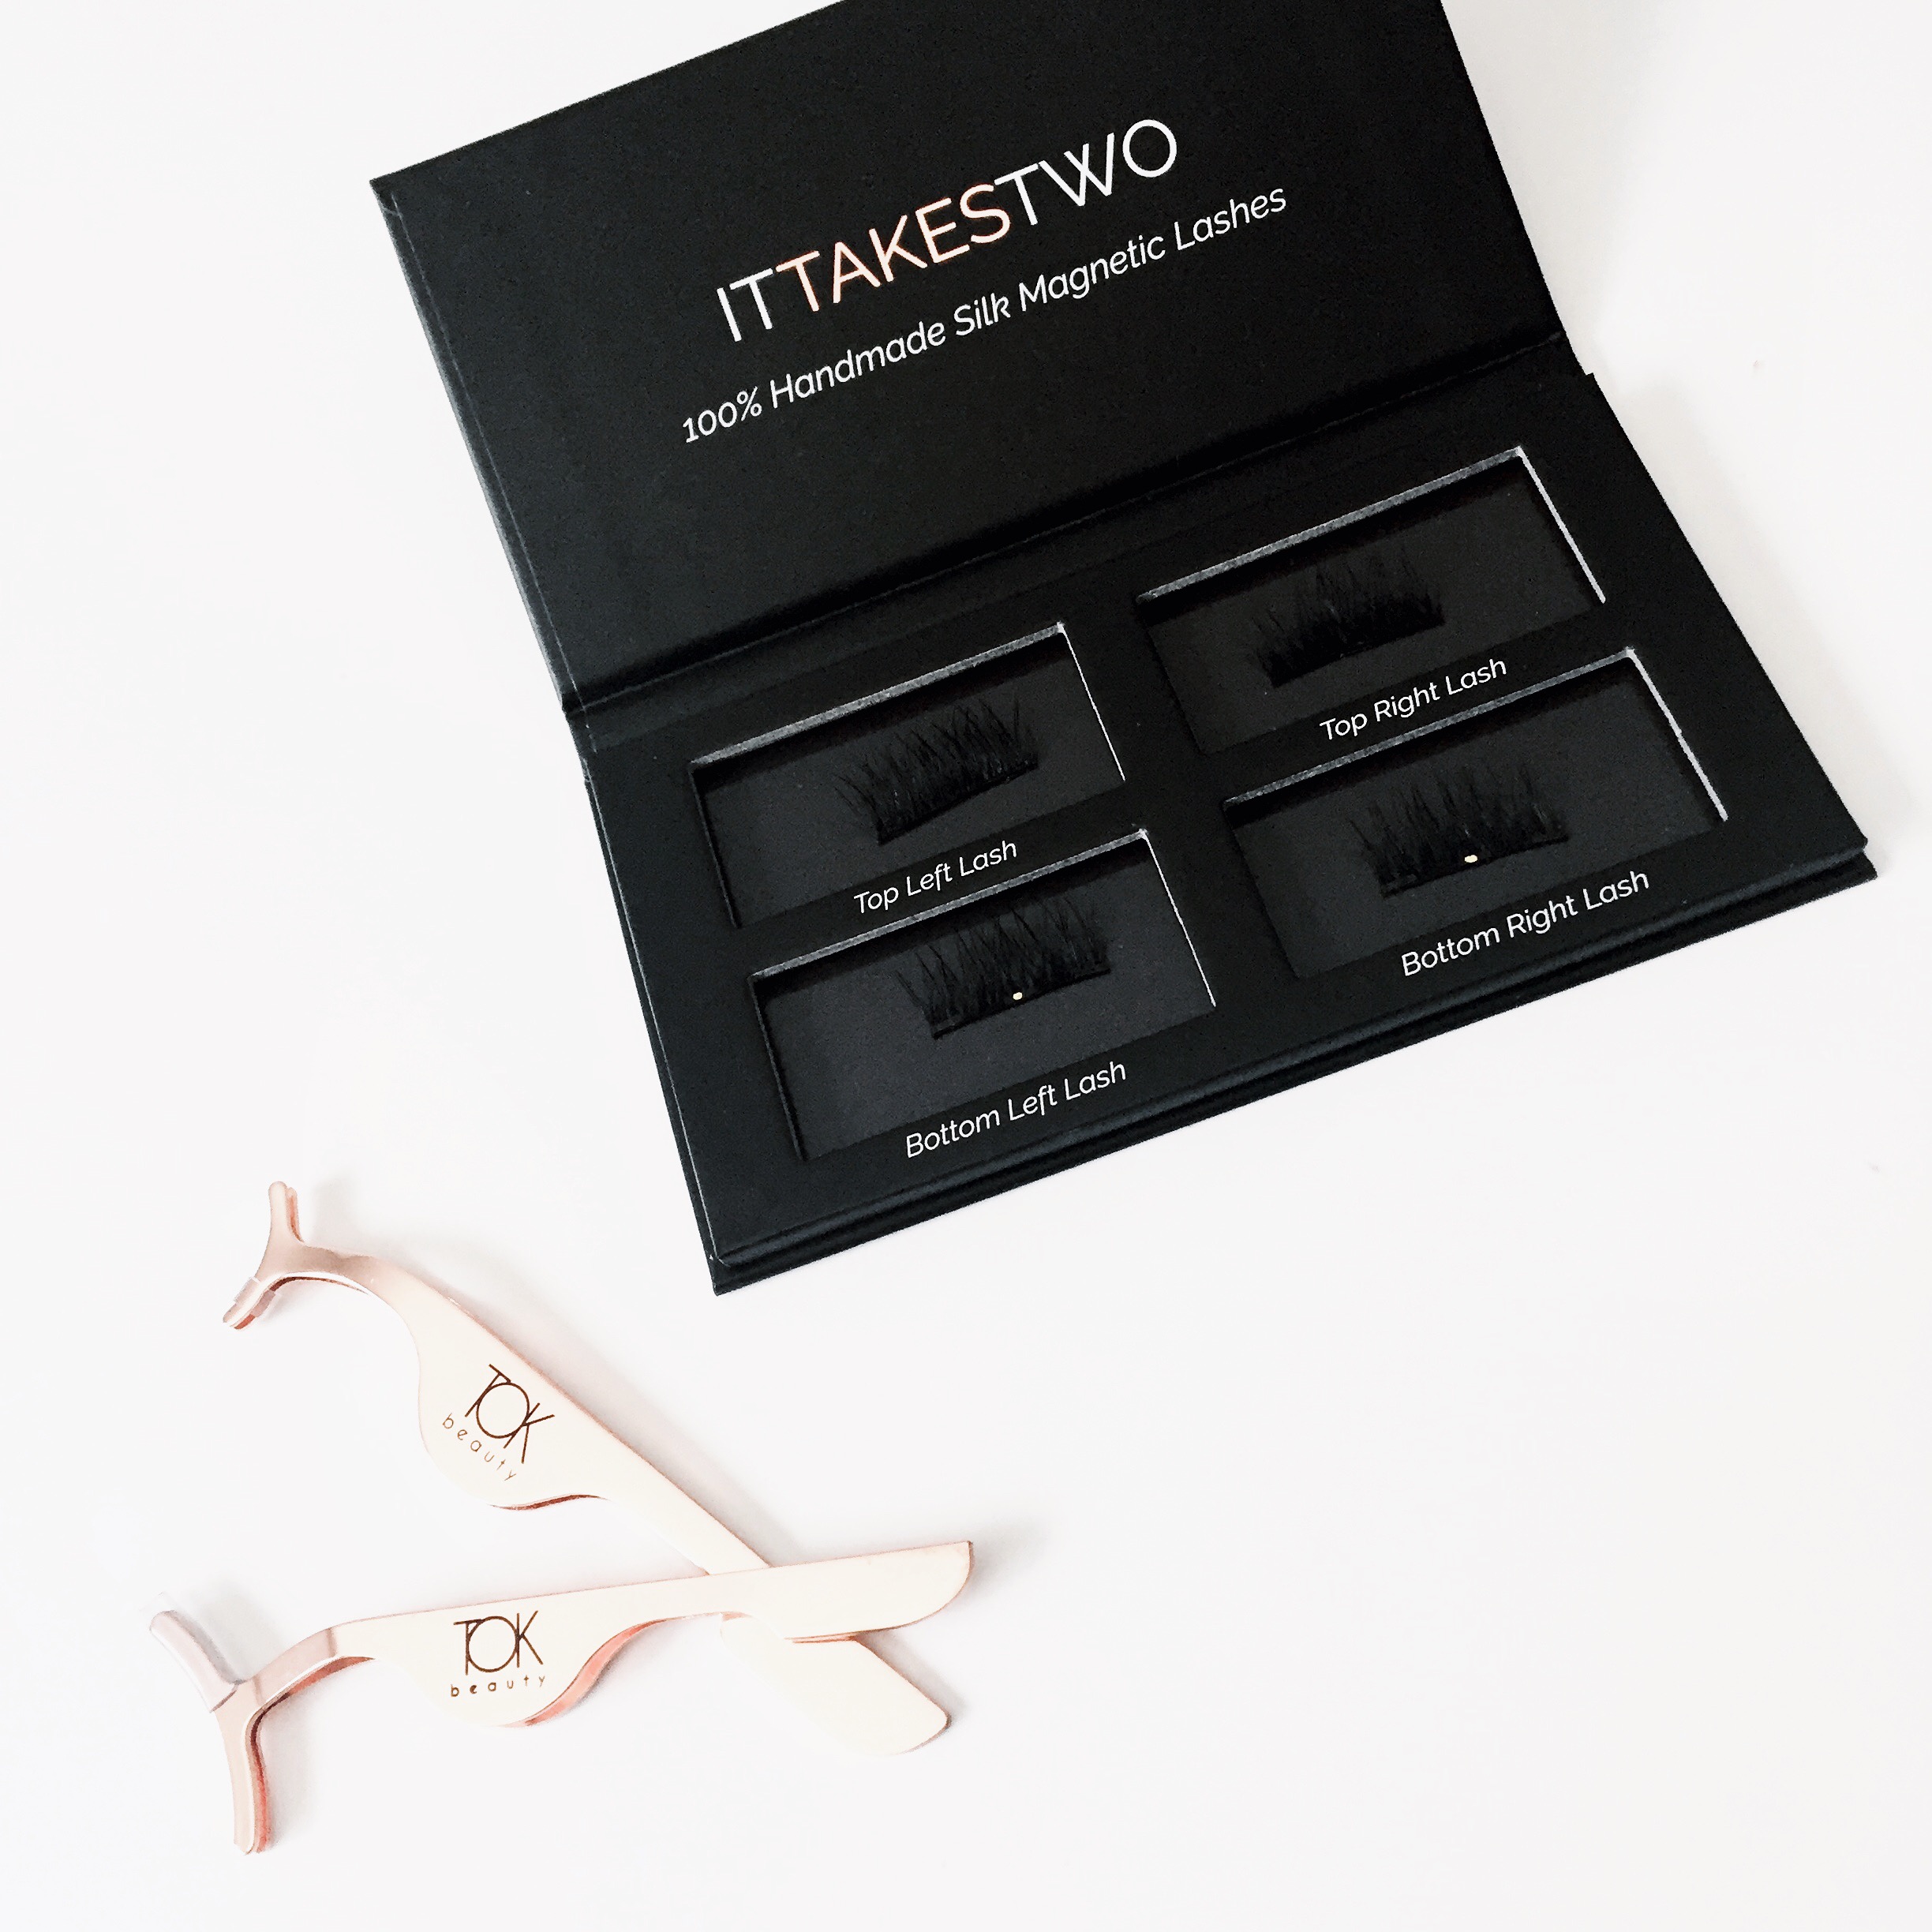
The lashes come stored in the prettiest magnetic boxes. They close magnetically so you don’t lose your lashes and the lashes have a spot for them to sleep when not in use on their own magnetic bed. This storage case along with proper care will keep your lash life longer and will ensure you don’t lose them after usage. I think I have lost just about every pair of glued lashes after I pulled them off. Partly because I had no compartment to store them back into easily, partly because the build up of glue on the bands are sometimes difficult to peel off without plucking out lashes from the band creating a frazzled false lash. The lash compartment also labels where you store each lash (ie. top left, top right, bottom left, bottom right) and the bottom lashes are marked with a tiny dot so you don’t confuse them with the top lashes.
The applicators for the lashes are the most gorgeous rose gold colour and are only $5.00. It makes for a really pretty product that is of high quality to boot. They are like tweezers with flat bands at the top to apply the lashes with. They don’t clamp down on their own and rather you are the one opening and closing them to set the lashes. There are different sizes of applicators for the differing lengths of lashes. The lashes range from short, medium to long band length and depends on the look as well as the length of your eye lash line. You can choose this option when checking out after you’ve decided between the Classic or Au Naturale Lash option.
As with everything on this blog, TOK’s lashes are cruelty free as they are made out of silk rather than any animal furs/hairs. The quality of the silk is incredibly high end and luxurious. The fibres are so soft and fluffy, they really feel and appear to look like real lashes making them blend into your own lashes smoothly.
Another benefit of these lashes is that they are re-usable many times with good care. I have to go out and purchase a new pair of falsies everytime I have a wedding or party to attend and the cost of single use lashes can be pricey if you add up the number of times you need them. These magnetic lashes will store in their compartment and the cost completely pays for itself with the amount of times they can be used.
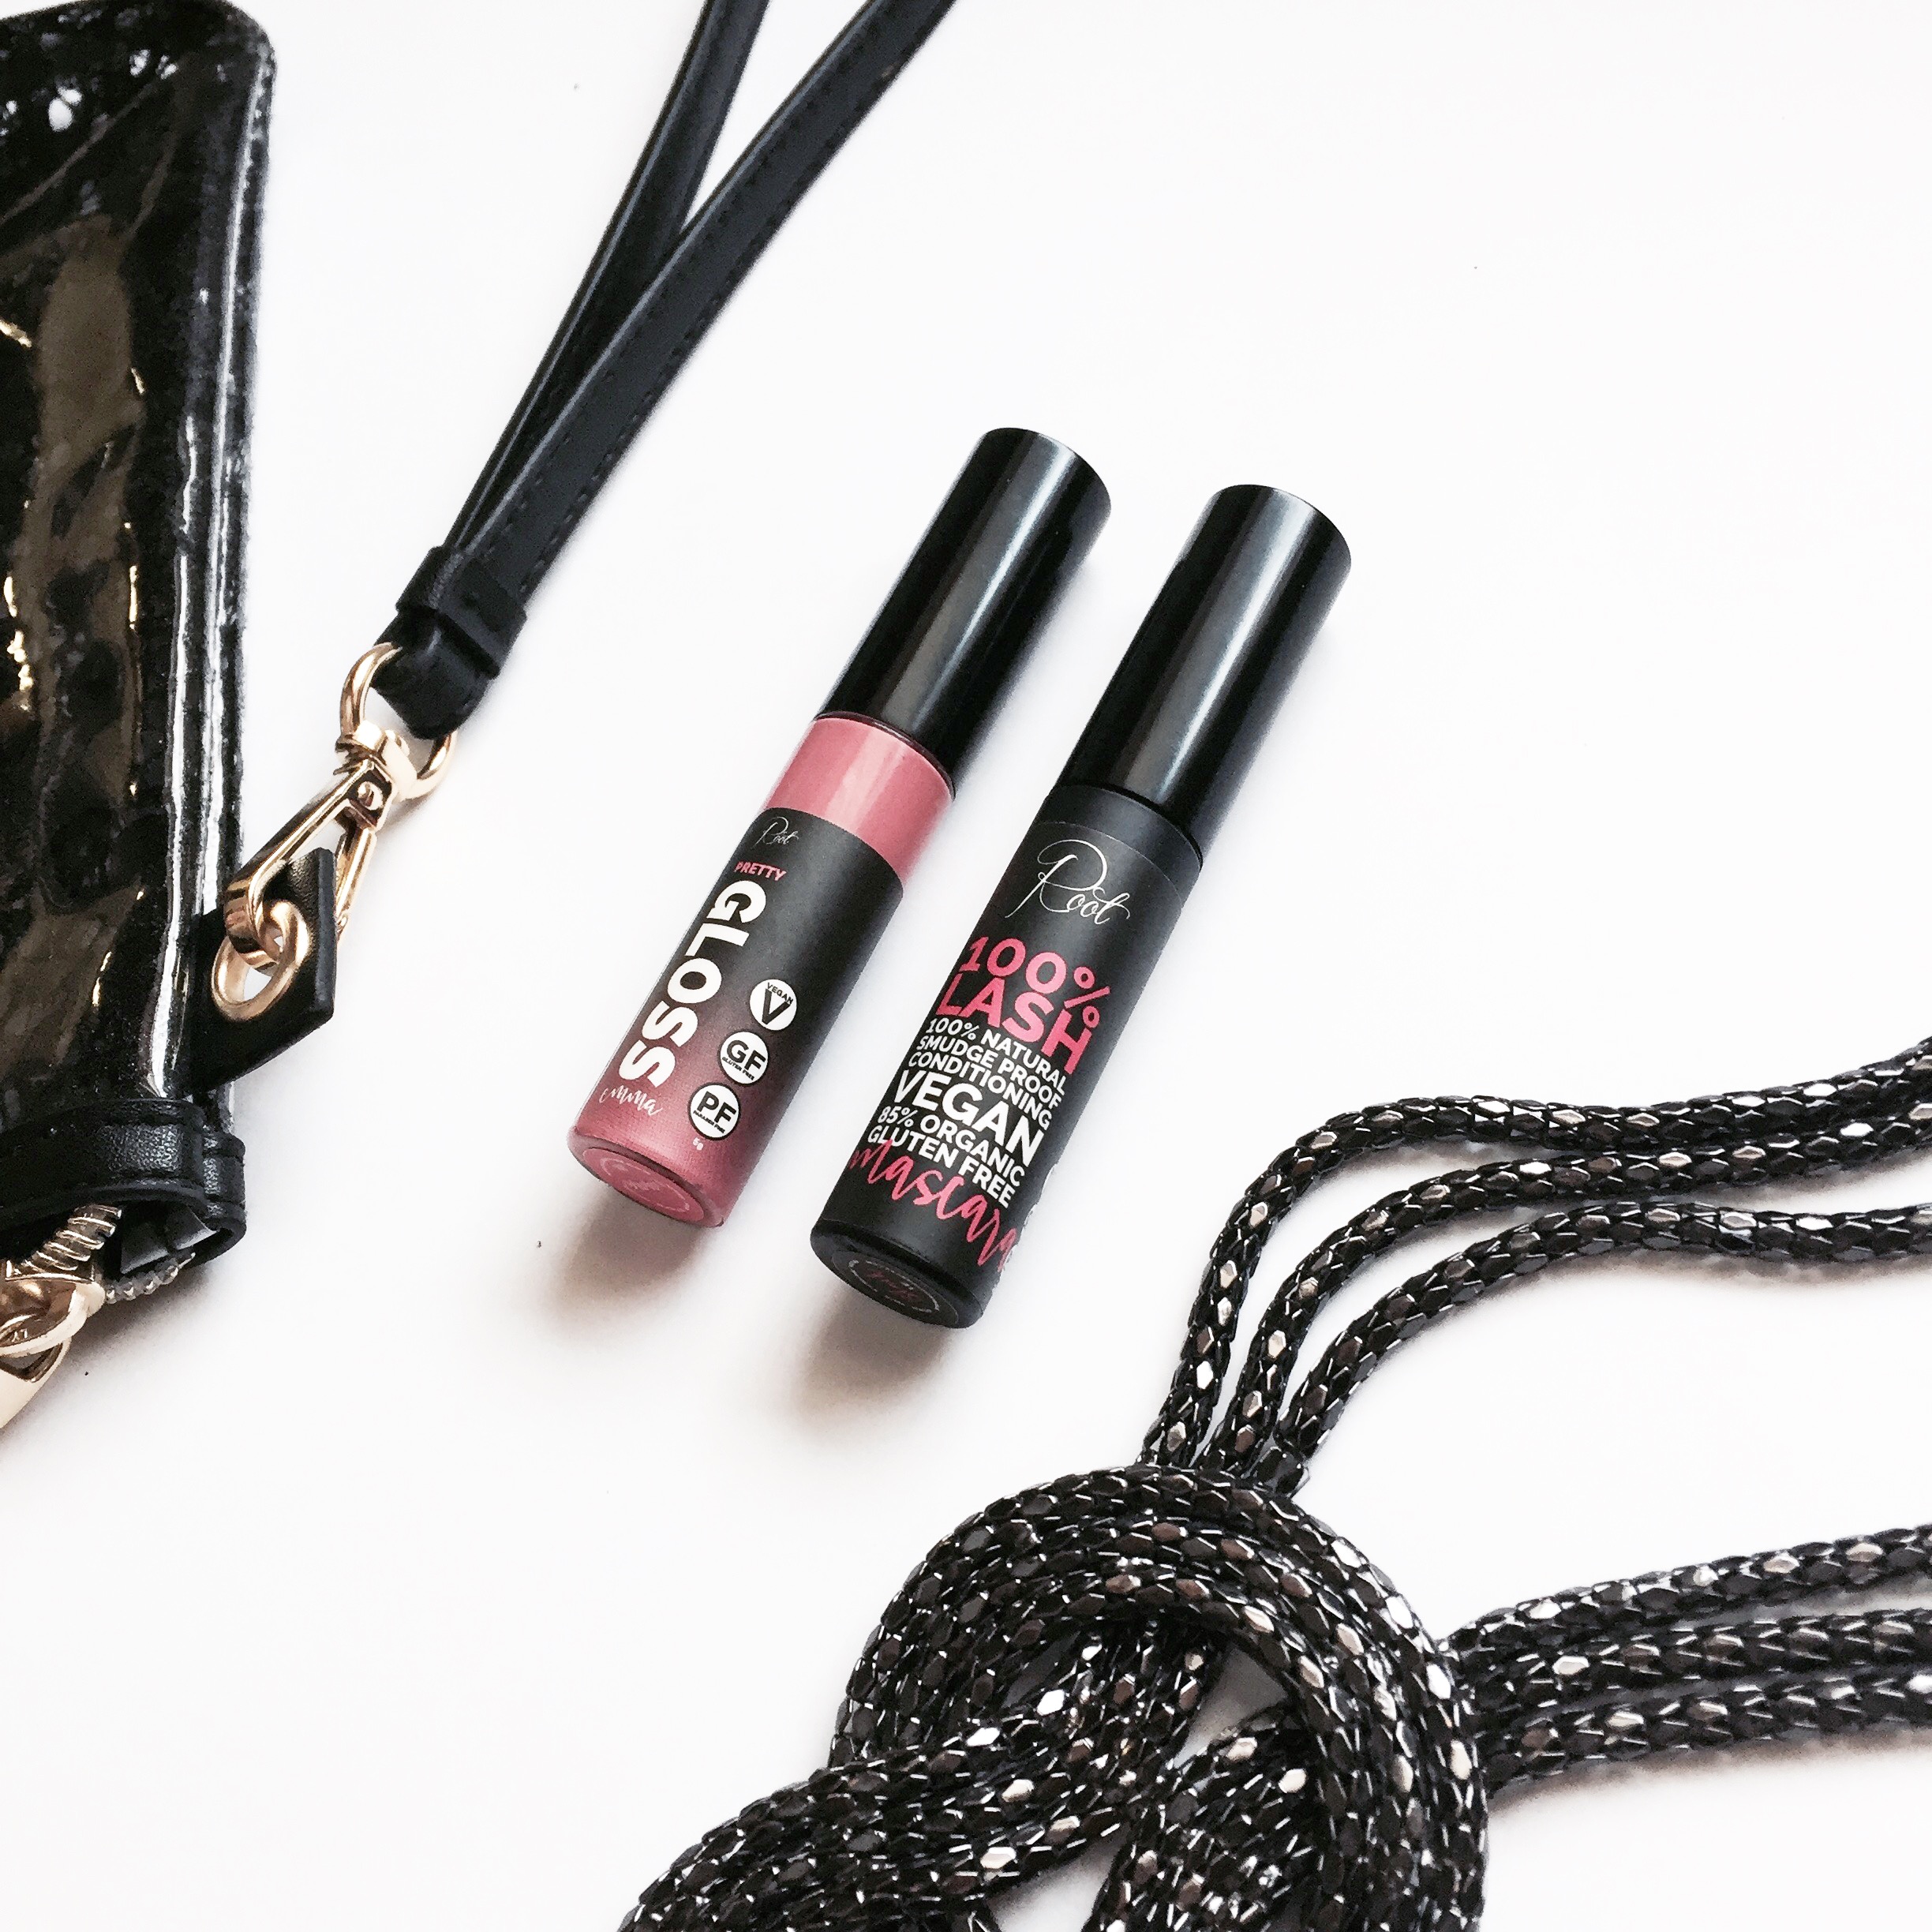
Lash Luv Mascara (Lash growth formula)
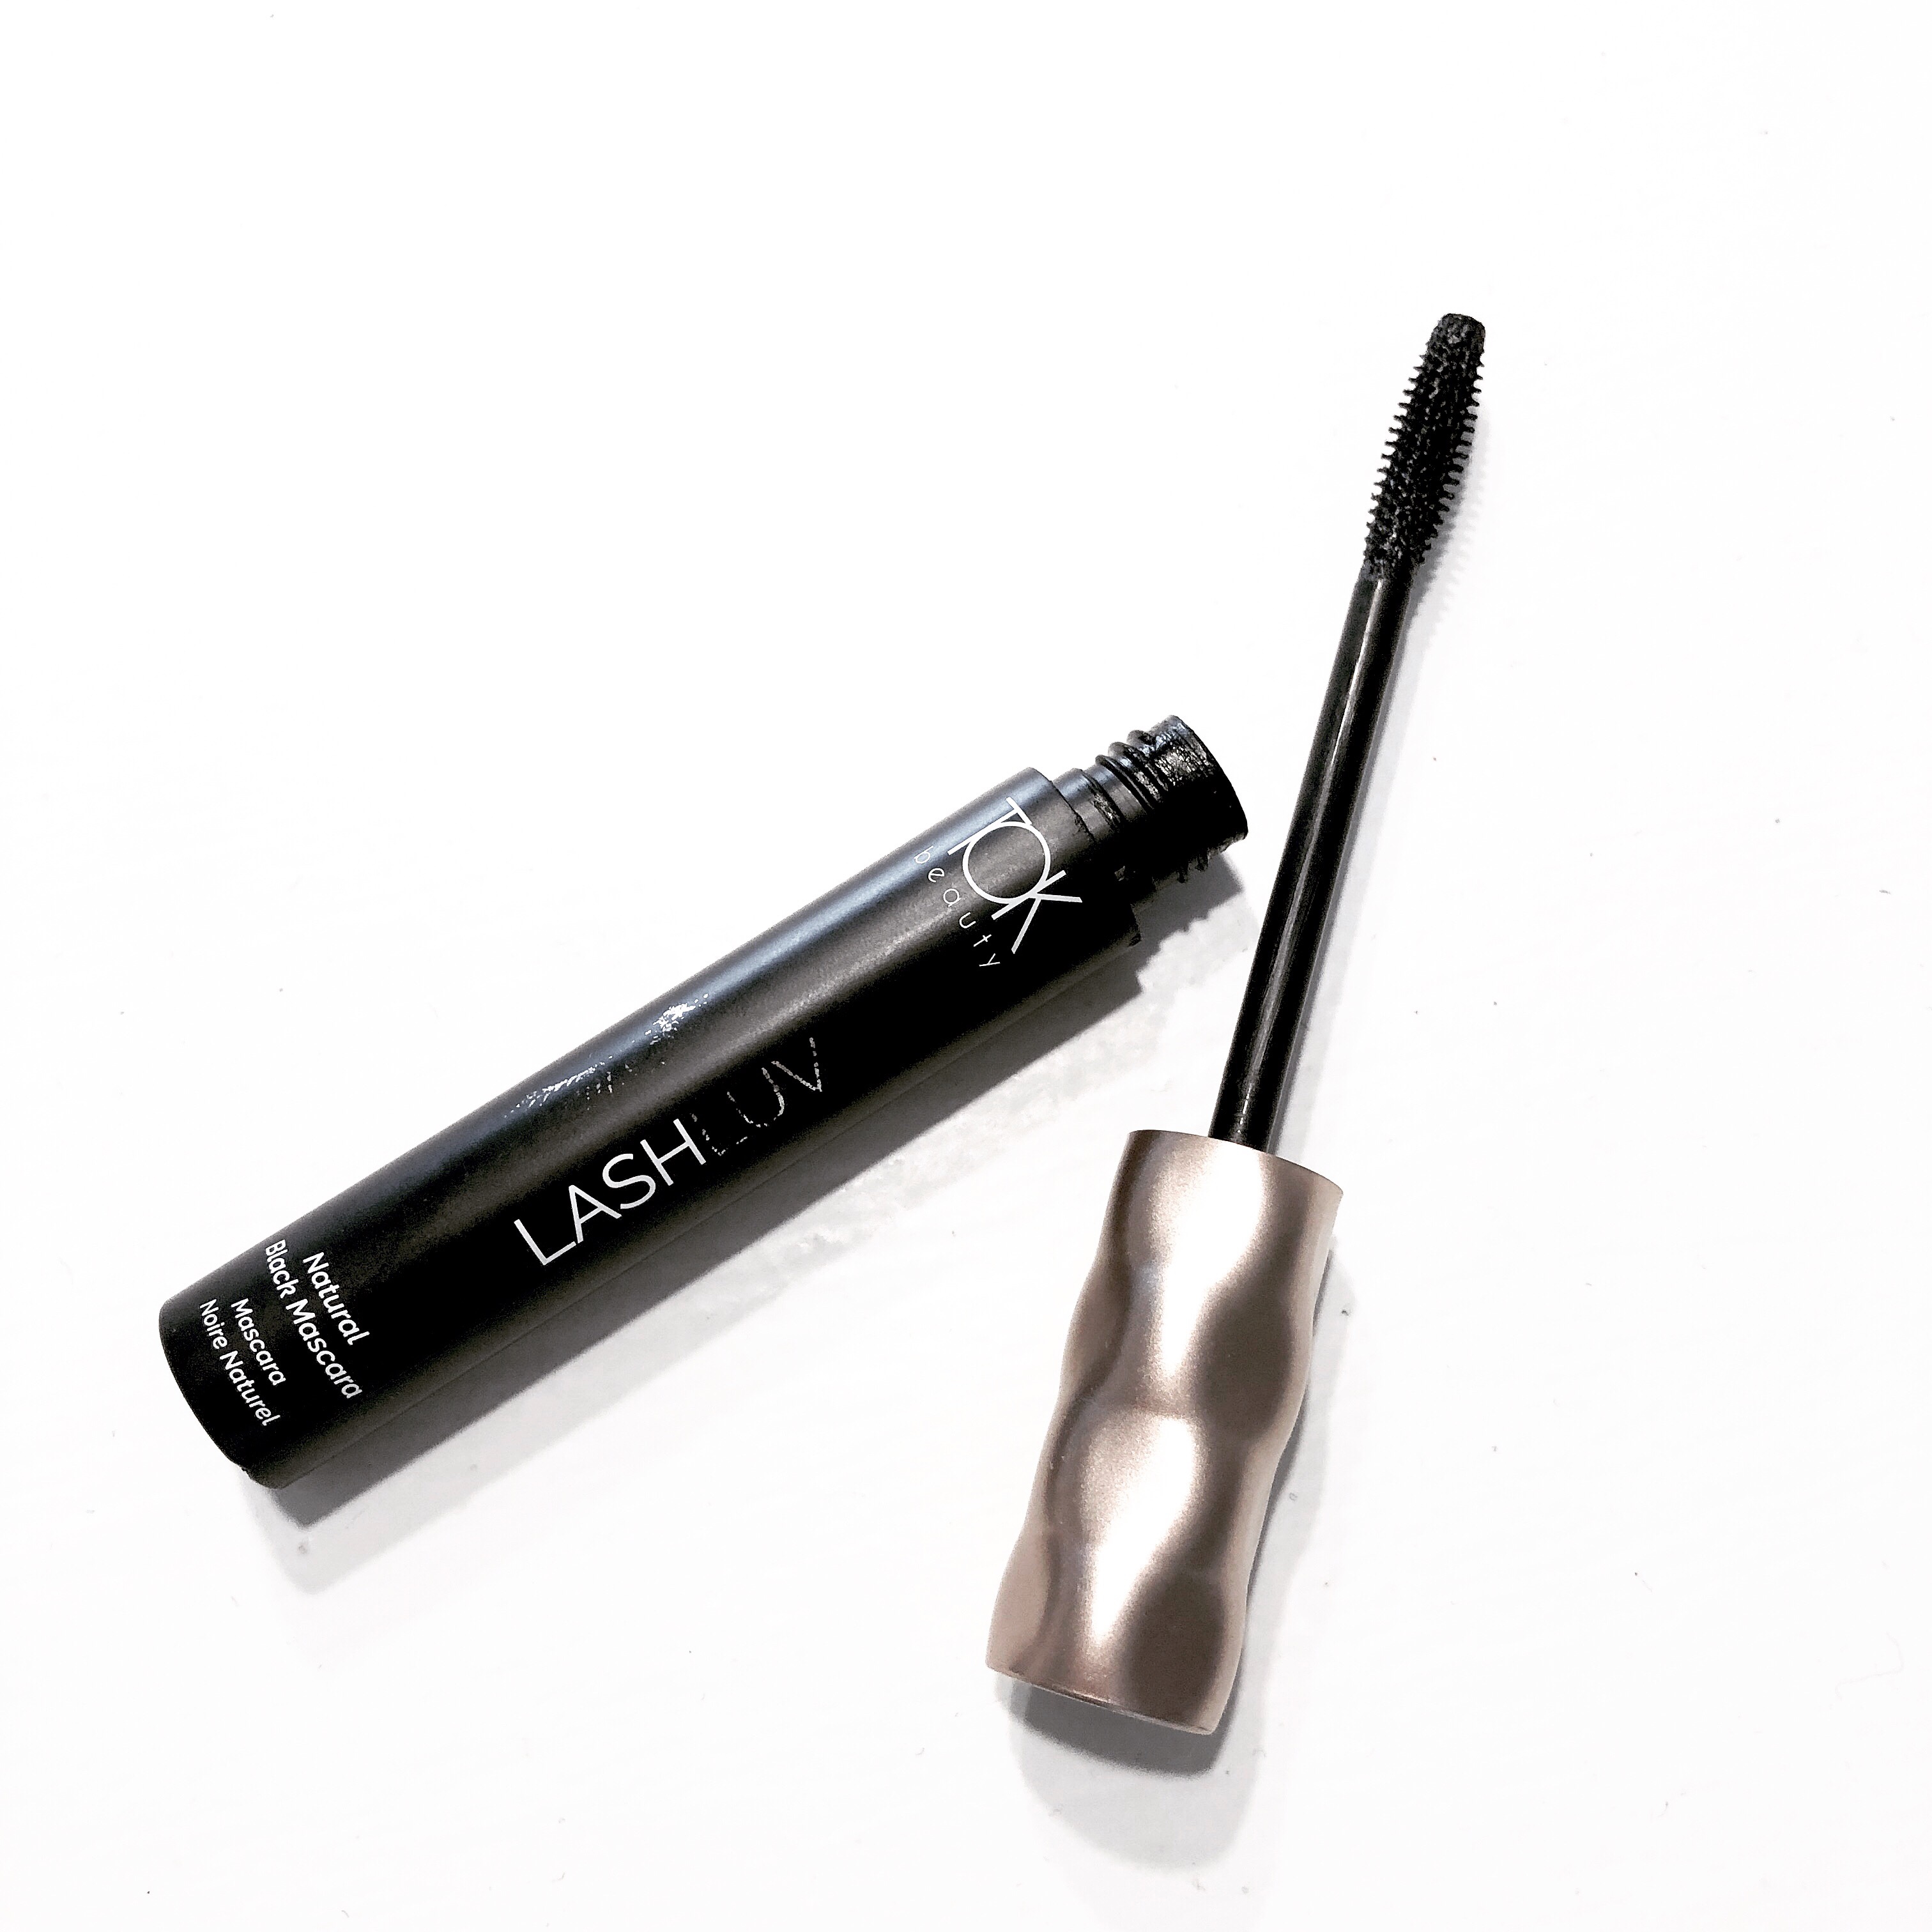
Since trying out TOK Beauty’s magnetic lashes, I’ve been able to test out their lash growth mascara. This mascara is one I’ve been using for over 6 weeks and I’ve really enjoyed it! The wand and brush are silicone and grab the lashes well to ensure you’re coating the entire length from lash line to the ends of the lash. The formula is a wetter formula. AS with all mascara formulas, it gets better after being opened and being exposed to the air. I highly recommend that when testing new mascaras, you give them a few weeks to really hit the air after you first open them. I never speak to mascaras until this happens as ALL formulas improve over time.
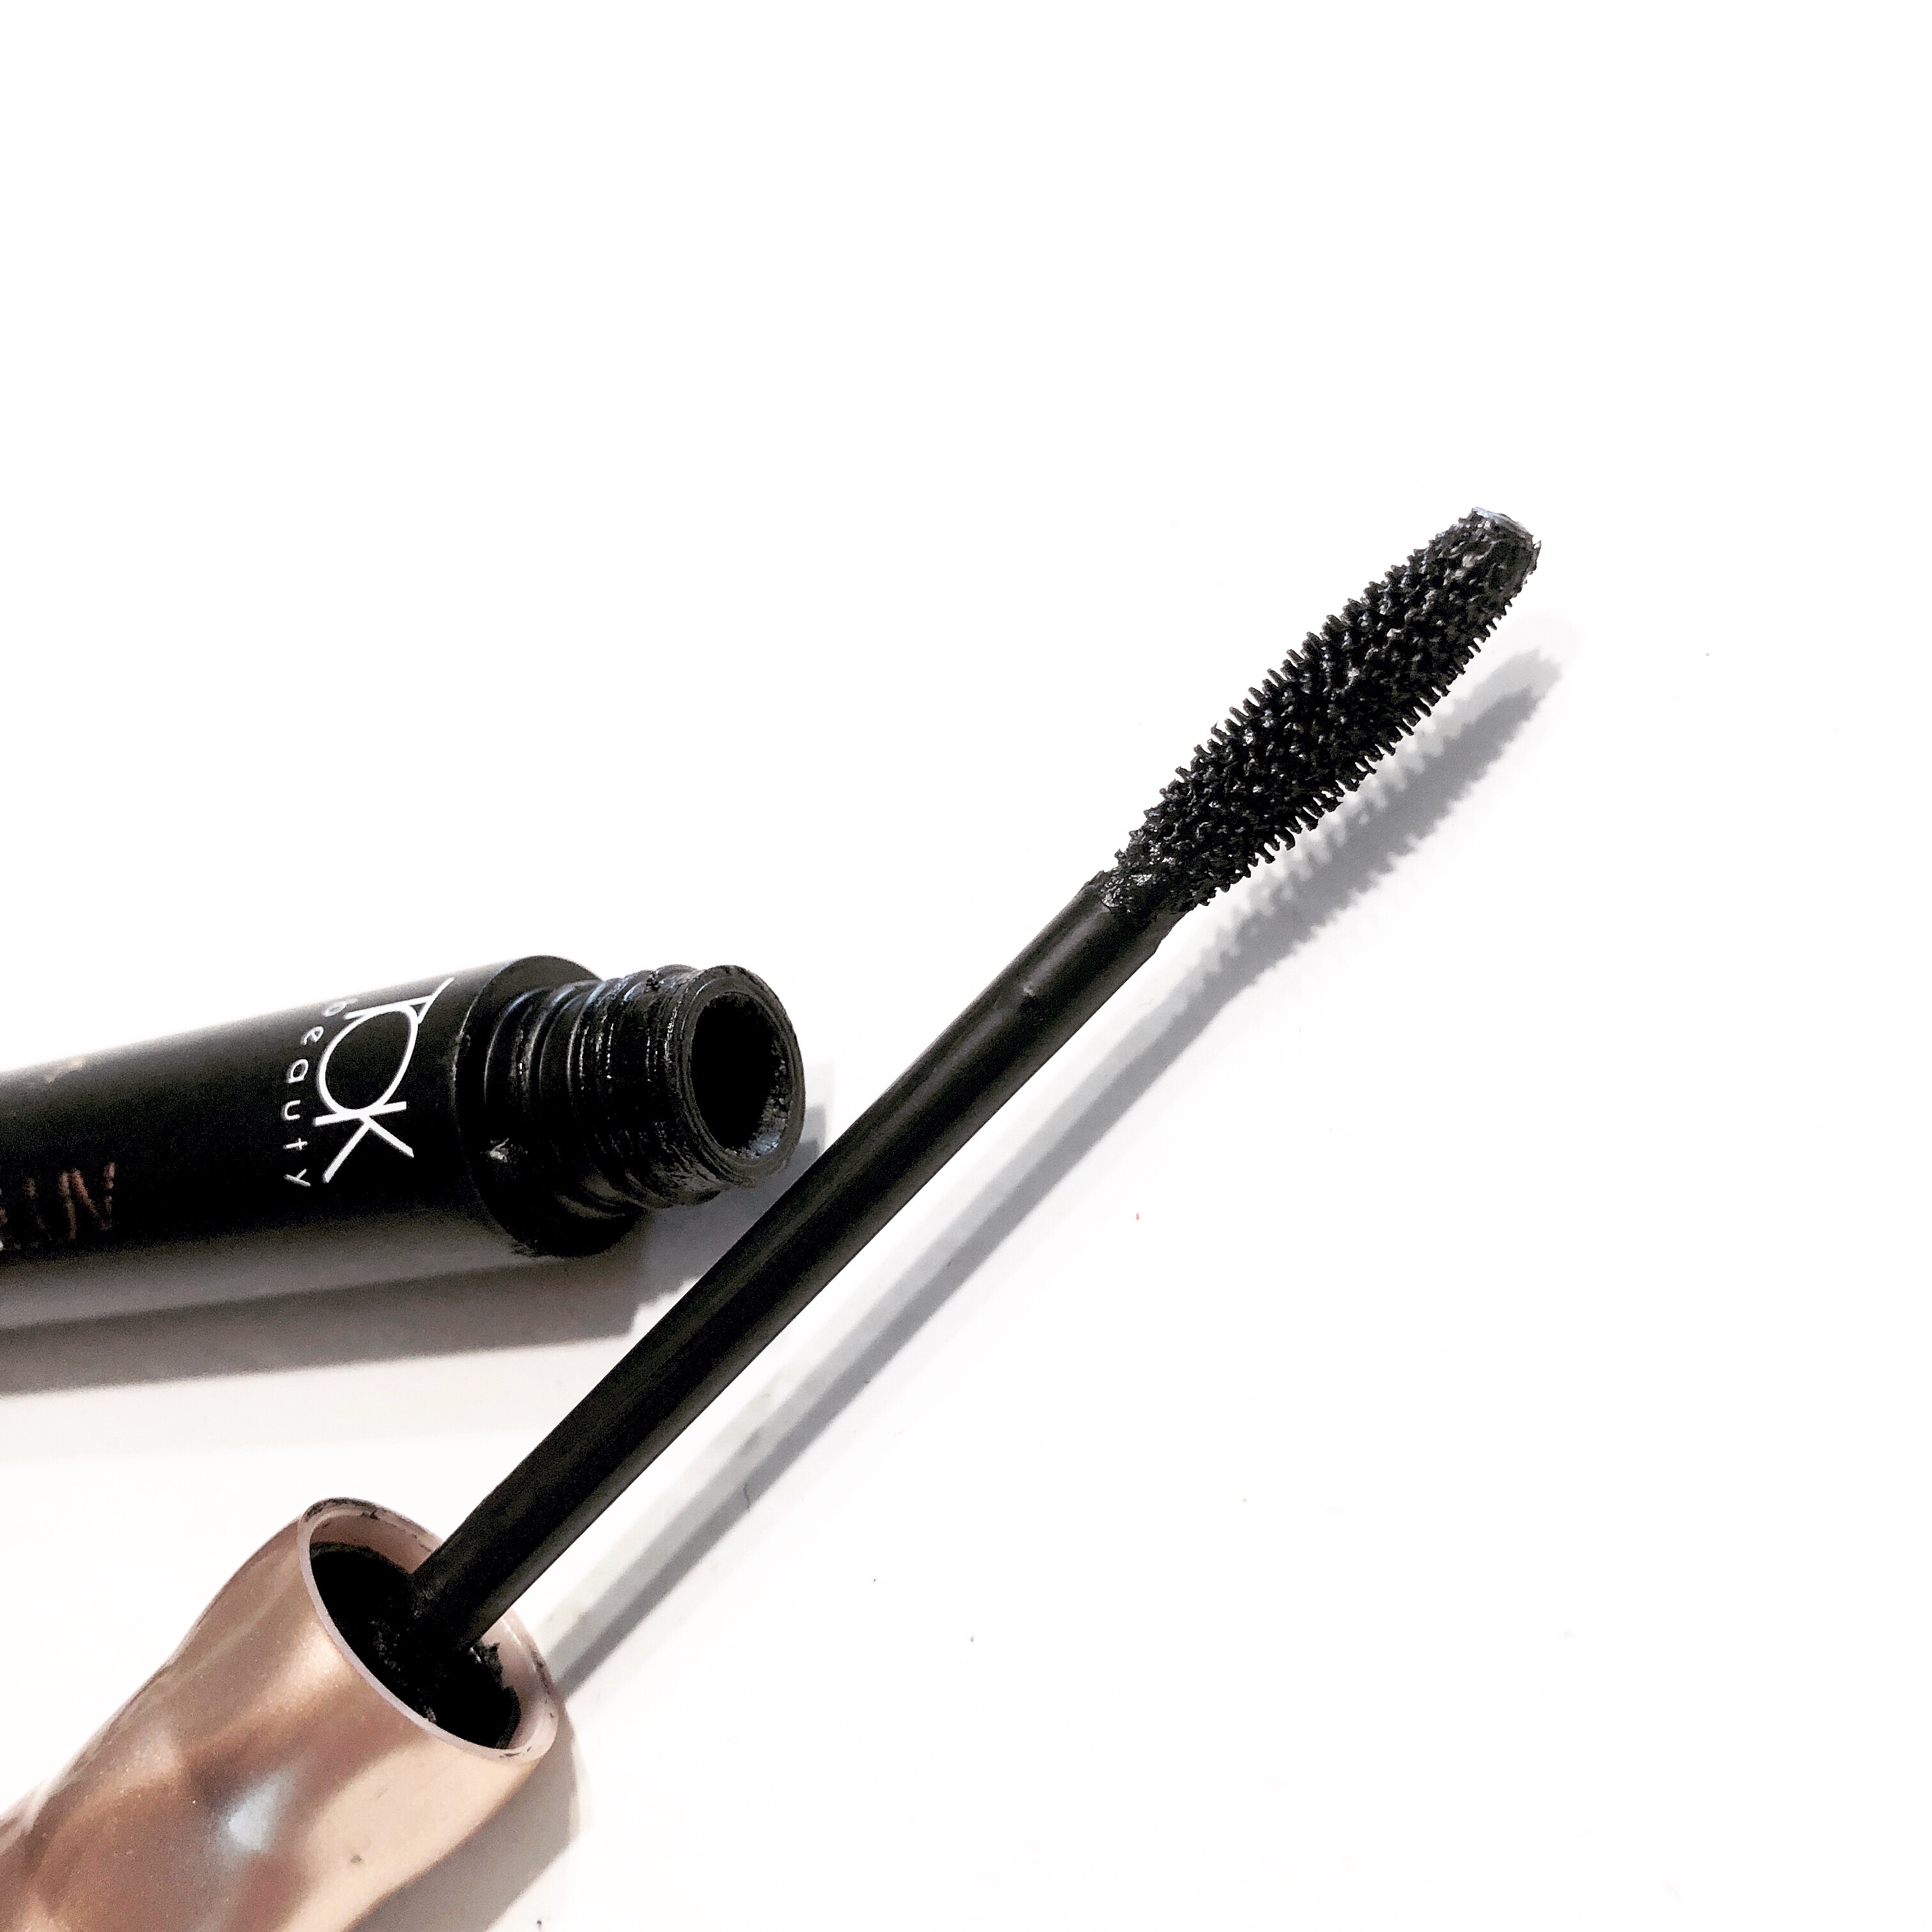
The Lash Luv mascara is amazing for lengthening thanks to the brush that grabs at the entire length of your lash during application. It layers well without clumping and I find the sweet spot is two coats of the formula. This mascara currently comes in the shade of black. I currently own the black shade and love it! Despite the fact that I usually gravitate towards drier mascara formulas, I highly recommend this mascara! It’s become one of my favourite formula in green beauty.
Full Ingredient List
Aqua, CI 77499, Hydrogenated Olive Oil Stearyl Esters, Stearic Acid, Copernicia Cerifera (Carnauba) Wax, Cetearyl Alcohol, Glycerin, Myrica Pubescens (Bayberry) Fruit Wax, Pullulan, Glyceryl Caprylate, Oleic/Linoleic/Linolenic Polyglycerides, Pisum Sativum (Pea) Peptide, Equisetum Arvense (Horsetail) Extract, Xanthan Gum, Simmondsia Chinensis Seed Oil, Sodium Hydroxide, Galactoarabinan.
You can check out Lash Luv Mascara HERE.
Tara from TOK Beauty has also offered a 10% OFF code for all Bloom + Clementine readers. This applies to all product but excludes gift sets which already come at a reduced rate.
TOK Beauty has a wide range of lash options including magnetic lashes, adhesive lashes, a more natural option for lash glue, tools, wipes and a newly launched growth serum mascara that I am so excited to try! Use code: ‘BLOOM10’ at checkout and you can check out all of TOK Beauty’s collection HERE.
This post was sponsored by TOK Beauty, as always, all opinions are my own.
No Comments